Click here to download LED lamp sample code for rapid development of SoC scheme
Overview
GizLamp is a simple and common smart product, whose hardware circuitry and the program are not complicated. We will use the Gokit3(S) development board and Gizwits IoT Cloud to demonstrate how to upgrade a traditional light bulb into a low-cost smart light which supports remote control.
This document takes the GizLamp project as an example to demonstrate how to quickly connect the device to Gizwits IoT Cloud to achieve hardware intelligence with a Gokit3 (S) development board based on the SoC scheme on the ESP8266 module.
Development process
1. Development prerequisites
Hardware
1*Gokit3(S)development board
5*DuPont lines
1*USB to serial converter, such as ft232, cp2102, ch340
1*Micro USB cable
Software
Oracle VM VirtualBox
Espressif IDE for ESP8266
Others
A Gizwis developer account
Source code of WeChat Pet House for Gokit3(S) ESP8266 V03000003 (available from Gizwits Download Center)
The automatically generated SoC source code for GizLamp project (see the section below to generate it)
Additional instructions
If the Gokit3 is not available, you can refer to the Gokit3 schematic to set up your own hardware based on the ESP8266 module (the module’s flash size must be 4MB. The recommended module is AiThinker esp-12f). The schematic link: http://club.gizwits.com/thread-2889-1-1.html
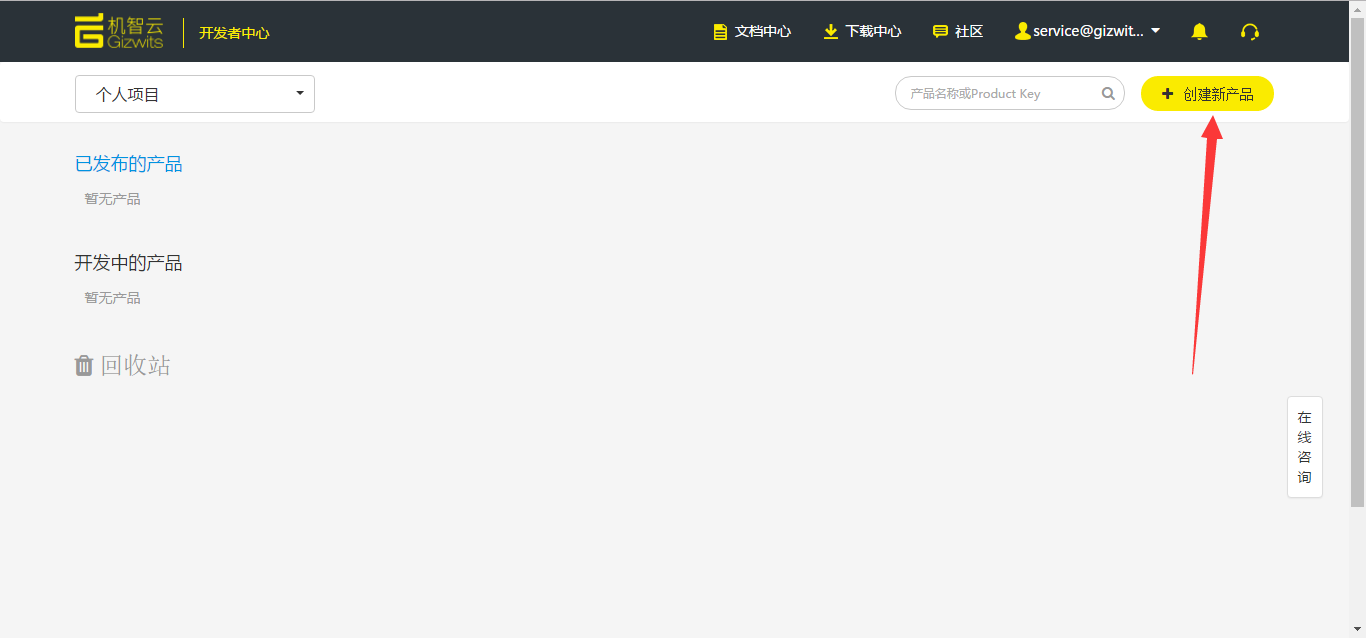
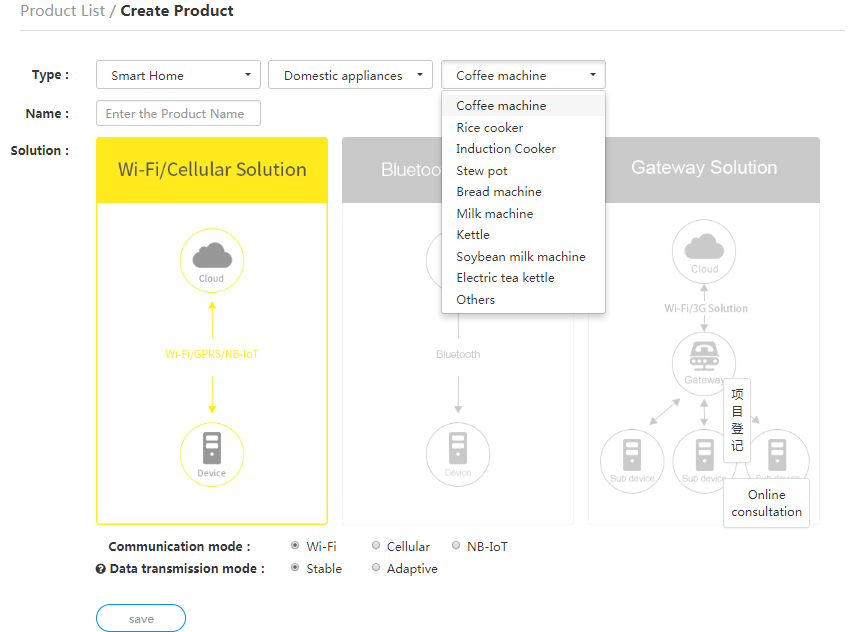
After registration and logging into the Gizwits Developer Center, click the “Create New Product” button in the upper right corner of the Developer Center. Then type the new product name “GizLamp”, and select “Wi-Fi/Mobile” network access plan as shown below.
2.3 Create Data Points
The Data Point refers to the functionality abstraction of a device product, which describes the product’s capabilities and its parameters. After Data Points are created, the data format of the device and the cloud communication can be determined, and the device and Gizwits IoT Cloud can mutually recognize the data exchanged between the device and Gizwits IoT Cloud.
For more details, click “Data Point tutorial” in the upper right corner of Data Point page of Developer Center.
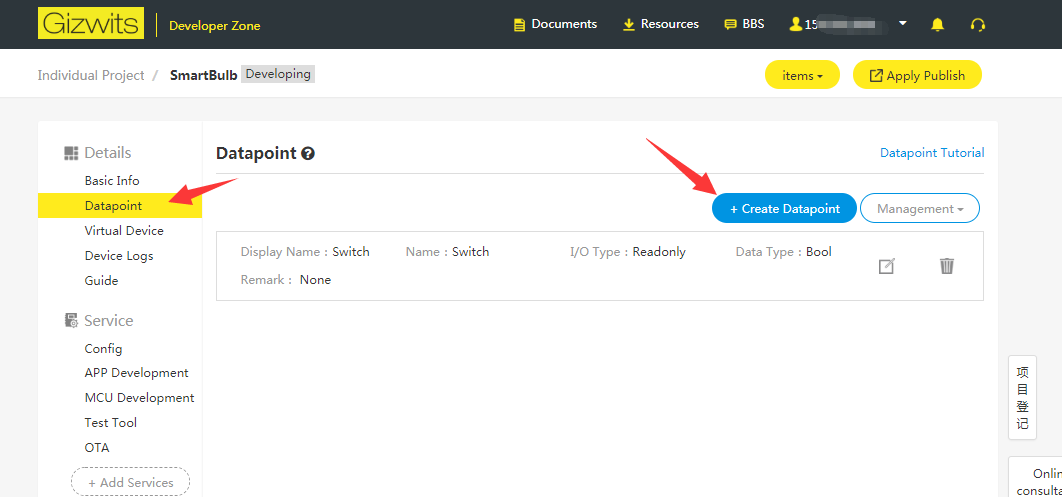
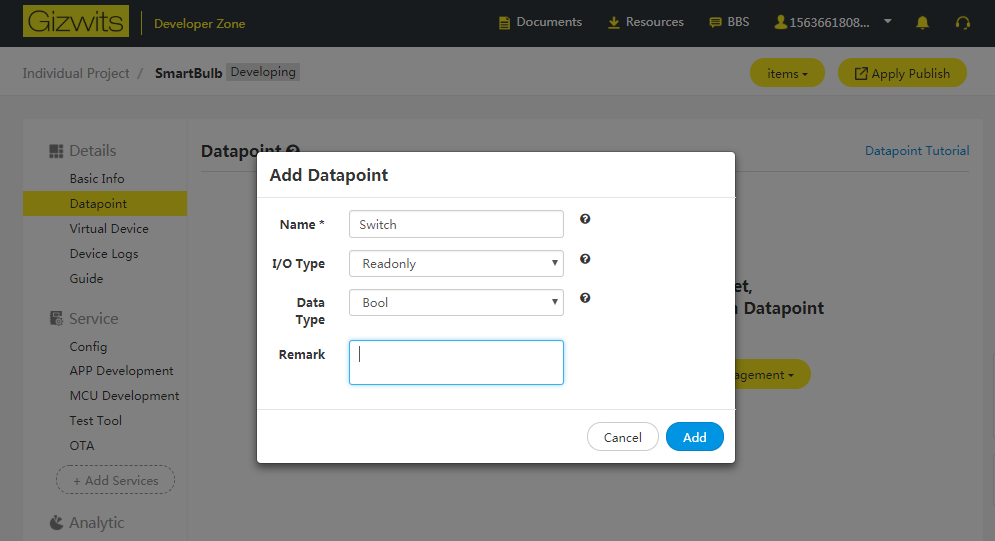
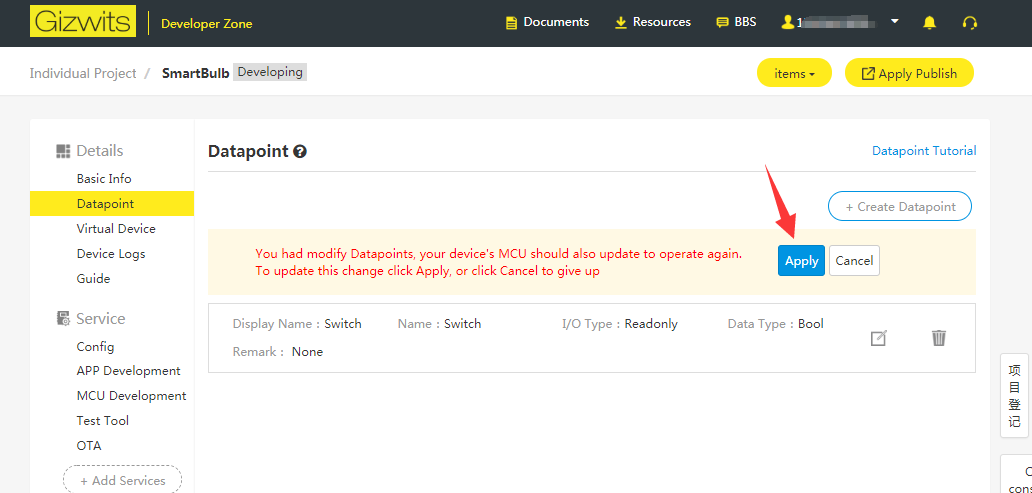
Take the project “GizLamp” as an example to briefly describe the relationship between the cloud Data Points and the functions of the product. This project “GizLamp” needs to implement the function of turning on and off the lamp remotely, so you should create a “Boolean” Data Point in the cloud to complete this task, as shown below:
After adding the Data Point, click “Apply” as the figure below.
2.4 Gizwits MCU Code Auto-Generator
2.4.1 Introduction
In order to lower the development barrier, shorten the development cycle, and reduce the development investment, Gizwits has rolled out Gizwits MCU Code Auto-Generator, which generates the device-side code for the corresponding product based on Data Points defined for the product. The automatically generated MCU code implements the packet encapsulation and parsing of the Gizwits communication protocol, the conversion logic of sensor data and communication data. All of these functions are integrated into a simple API set. When the device receives data from the cloud or the App, the program converts the data into corresponding events and notifies the application layer. You only needs to add the sensor control functions to the corresponding event handlers to complete the product development.
To get the cloud automatically generated source code based on ESP8266 for GizLamp project, refer to Gizwits MCU Code Auto-generator.
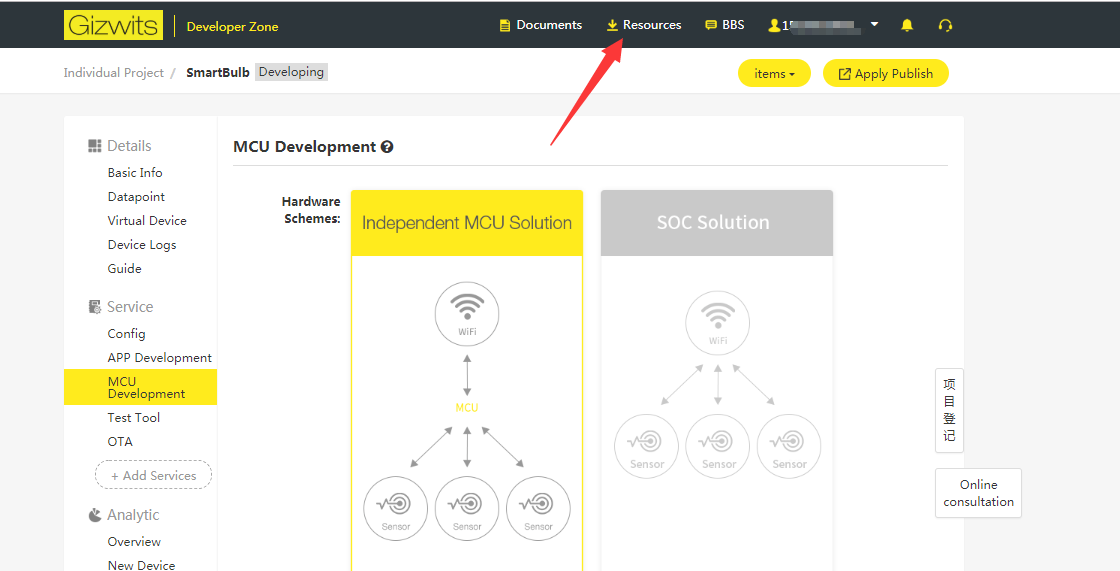
After creating the product Data Point, click “MCU Development” on the left navigation pane and select “SoC Scheme. Currently the default “Hardware Platform” for the SoC scheme is ESP8266. Scroll down to the bottom to click “Generate Code” and wait for about 30 seconds to generate the gizLamp code package based on ESP8266. Then download the package. So that the downloaded file name is too long and contains ProductKey of the product, rename the downloaded file name to “GizLamp” as shown below:
Note: Gizwits MCU Code Auto-Generator currently only supports ESP8266 for the SoC scheme.
2.4.2 Secondary development for the project source code
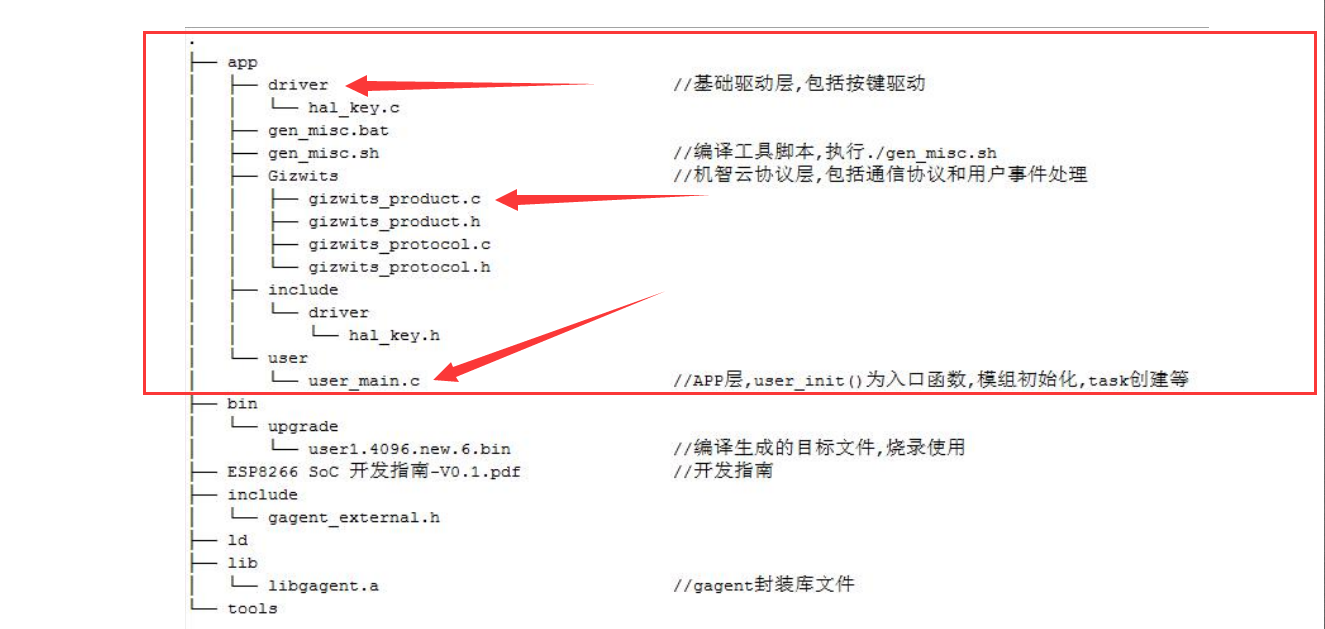
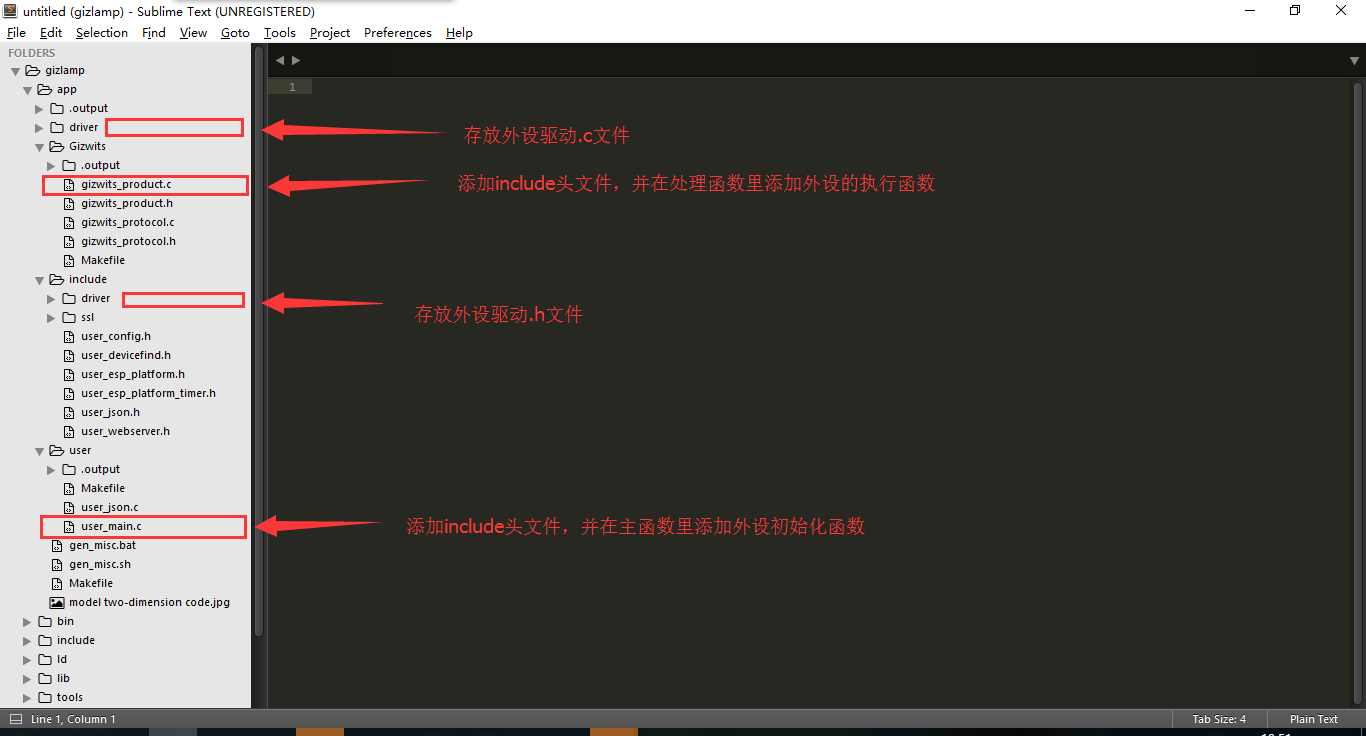
In the SoC source code generated automatically by Gizwits IoT Cloud, you only need to care about the files under “GizLamp\app”.
To add 8266 peripherals,
Add the .c file of the driver for the corresponding peripheral under the “GizLamp\app\driver” directory
Add the .h file of the driver for the corresponding peripheral under the “GizLamp\app\include\driver” directory
To process commands sent from App through the cloud,
Handle control events to actuate device peripherals in the GizwitsEventProcess() function of gizwits_product.c in the “GizLamp\app\Gizwits” directory To report device status,
Implement data reporting in the userTimerFunc() function of user_main.c in the “GizLamp\app\user” directory.
In this SoC source code, you just focus on above points. The module communication and the underlying drivers do not need developers to process and modify.
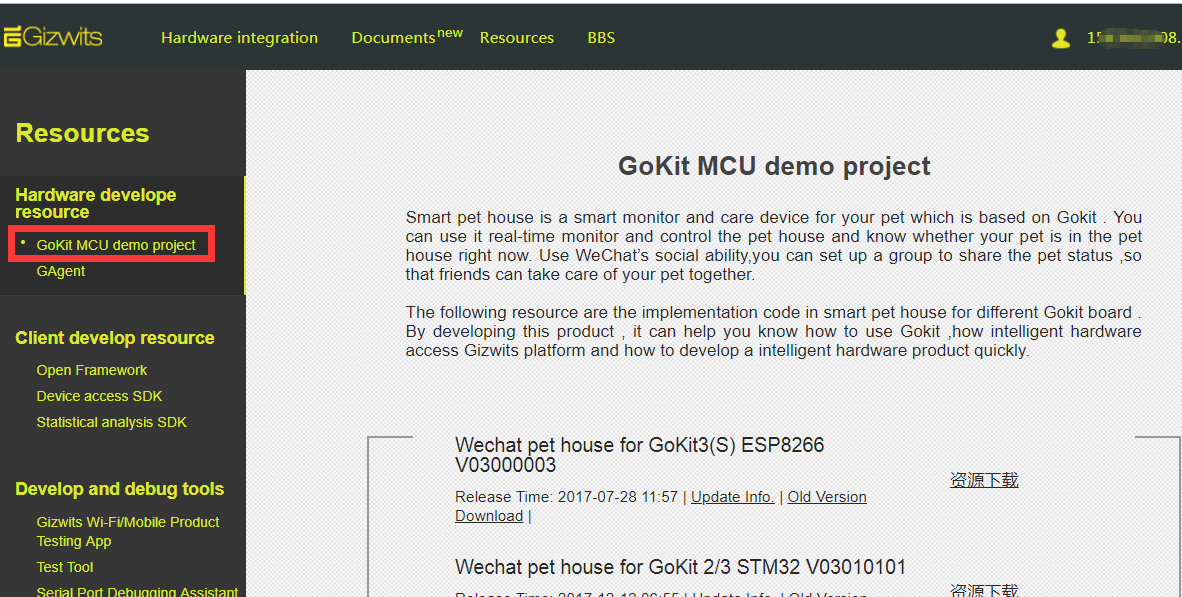
2.4.3 Go to Gizwits Download Center and get SoC source code of WeChat Pet House for Gokit3(S) ESP8266 V03000003
“WeChat Pet House for Gokit3(S) ESP8266 V03000003” is a case implemented by Gizwits engineers using Gokit3(S) board based on the ESP8266 hardware platform. The source code of this case includes peripheral drivers for infrared sensor, temperature and humidity sensor, small motor, RGB light, key, etc., which can be directly used on any Gokit3(S) board, or can be ported to other ESP8266 boards for use. The source code is as follows:
Note: For an in-depth understanding of the source code of WeChat Pet House case, you can refer to the following link: Source code exploration of WeChat Pet House
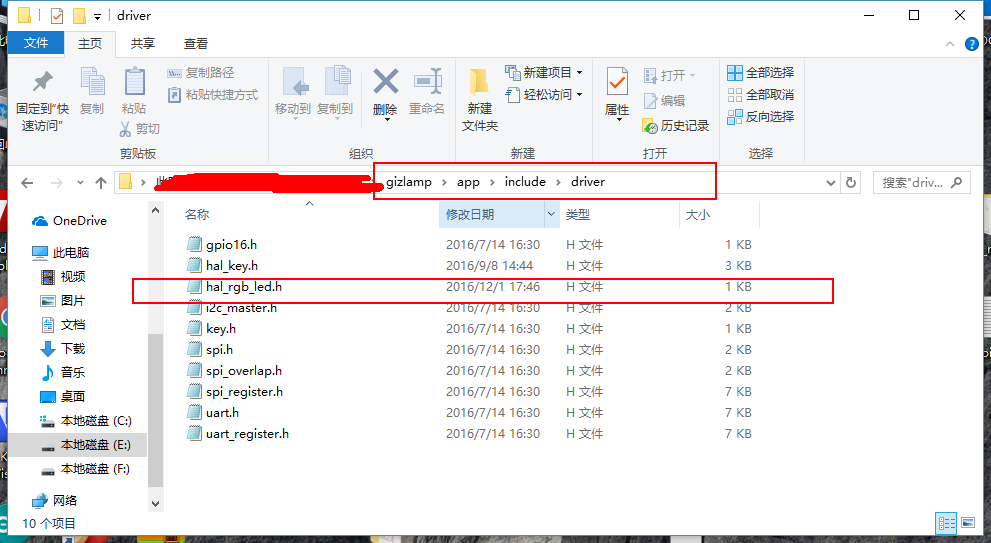
2.4.4 Port .c and .h files of the LED driver to the “GizLamp” project from “WeChat Pet House for Gokit3(S) ESP8266 V03000003” project
Copy hal_rgb_led.c in gokit3_SoC_ESP8266_03000003_2016120711\app\driver directory to gizlamp\app\driver
Copy hal_rgb_led.h in gokit3_SoC_ESP8266_03000003_2016120711\app\include\driver directory to gizlamp\app\include\driver
After completing the above preparation for the SoC code files, modify the corresponding c file below.
2.4.5 Modify SoC code files for GizLamp
Use Sublime software to open the entire project, and modify two files as follows:
The driver initialization of peripherals is done in user_init() function of user_main.c file in GizLamp\app\user directory.
The data sent by the cloud is processed in gizwitsEventProcess() function of gizwits_product.c in GizLamp\app\Gizwits directory.
The following picture shows where to modify the code.
Other instructions for the automatically generated SoC source code
The code for Key1 and Key2 is completed by Gizwits engineers based on Gokit3(S). If the hardware (not Gokit3) you set up by yourself is based on ESP8266, you need to modify the code for Key1 and Key2 to drive the GPIO port for your own keys. The code for keys is necessary because it is used to enable Wi-Fi to enter the corresponding configuration mode, and to push the SSID and password of the router to the Wi-Fi module through the App provided by Gizwits, so that the Wi-Fi module is connected to network.
The code snippets for Key1 and Key2.
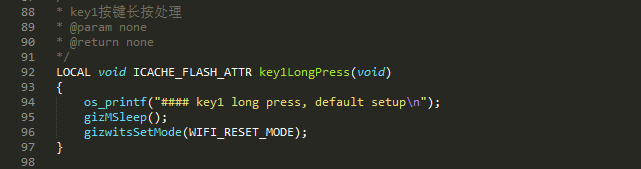
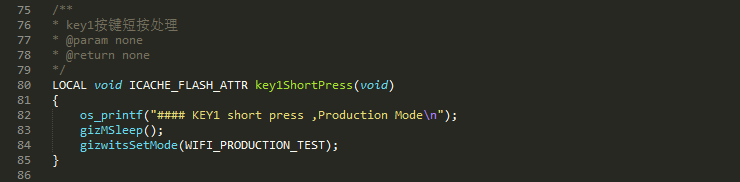
1) Key1
Used to reset Wi-Fi module or drop it into production mode
reset Wi-Fi -> Long press on Key1
Go into End-of-line test mode -> Short press on Key1
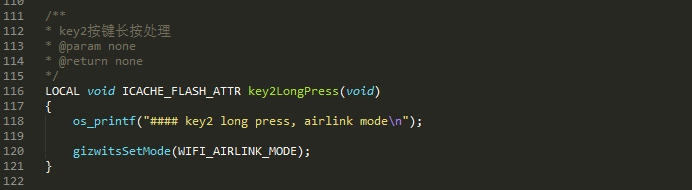
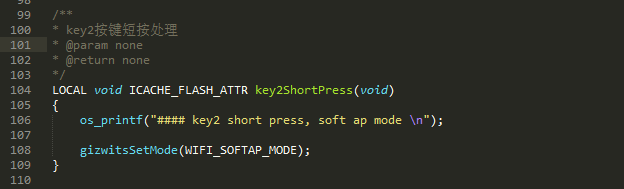
2) Key2
Used to trigger the module enter AirlLink or SoftAP configuration mode
AirlLink configuration mode -> Long press on Key2
SoftAP configuration mode -> Short press on Key2
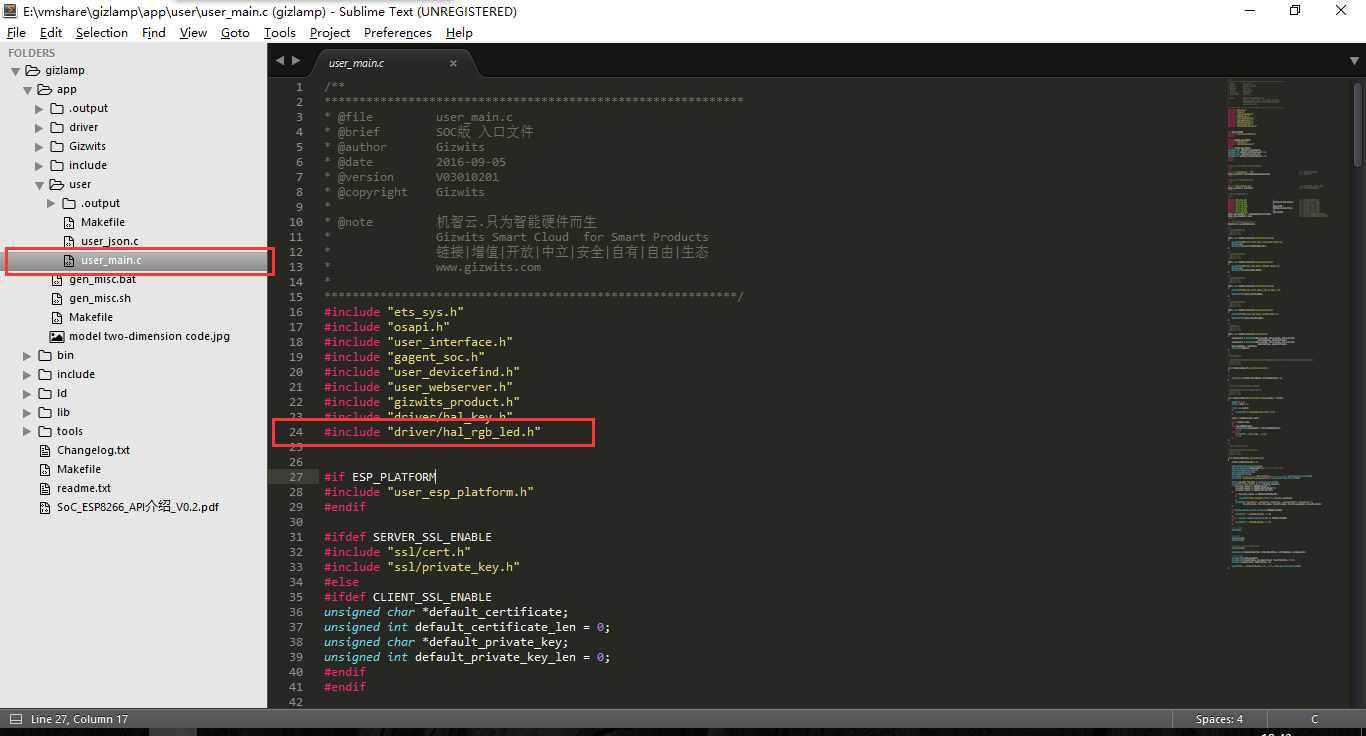
First add the following header file in user_main.c
1
#include "driver/hal_rgb_led.h"
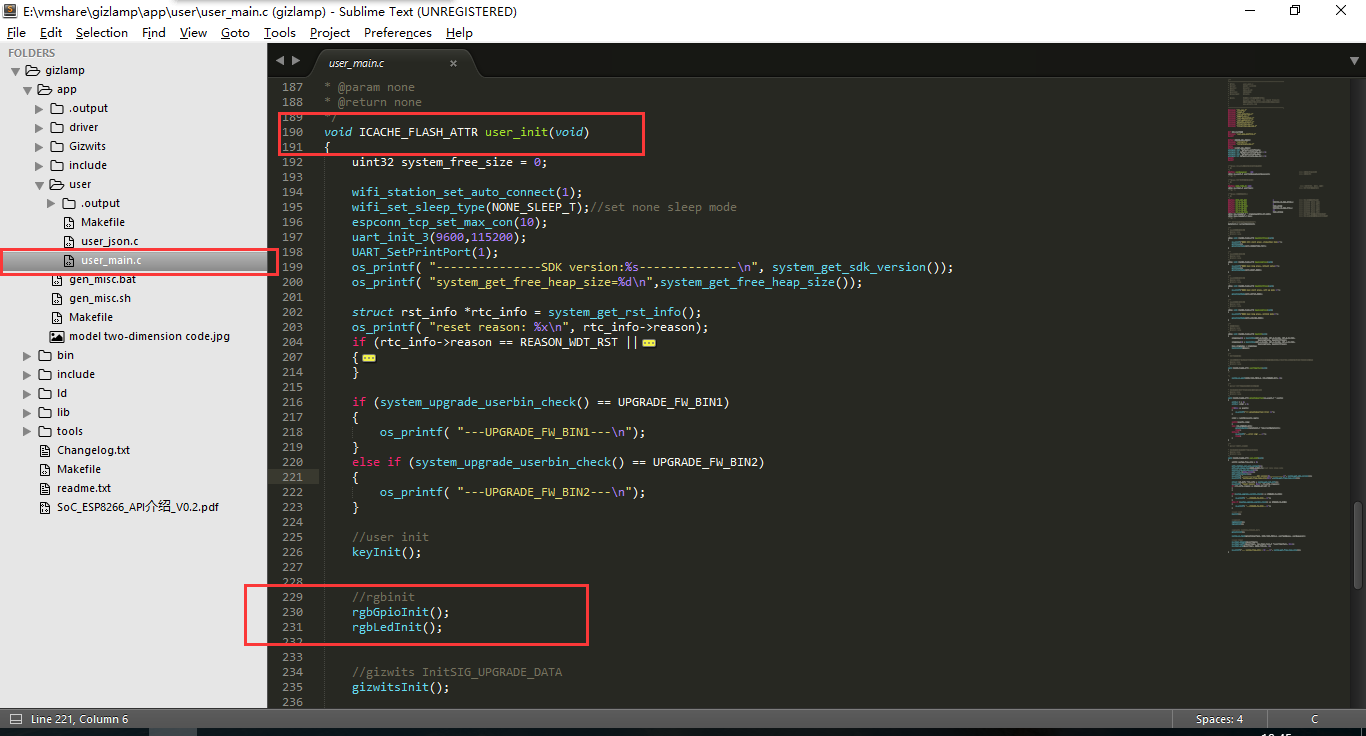
Then add the following two function calls in the “//user init” section of user_init() function to initialize the RGB light on Gokit3. The definitions of these two functions can be found in hal_rgb_led.c
1
2
3
//LED initialization function calls
rgbGpioInit()
rgbLedInit();
Add the header file
Add the LED initialization function calls in user_init() function
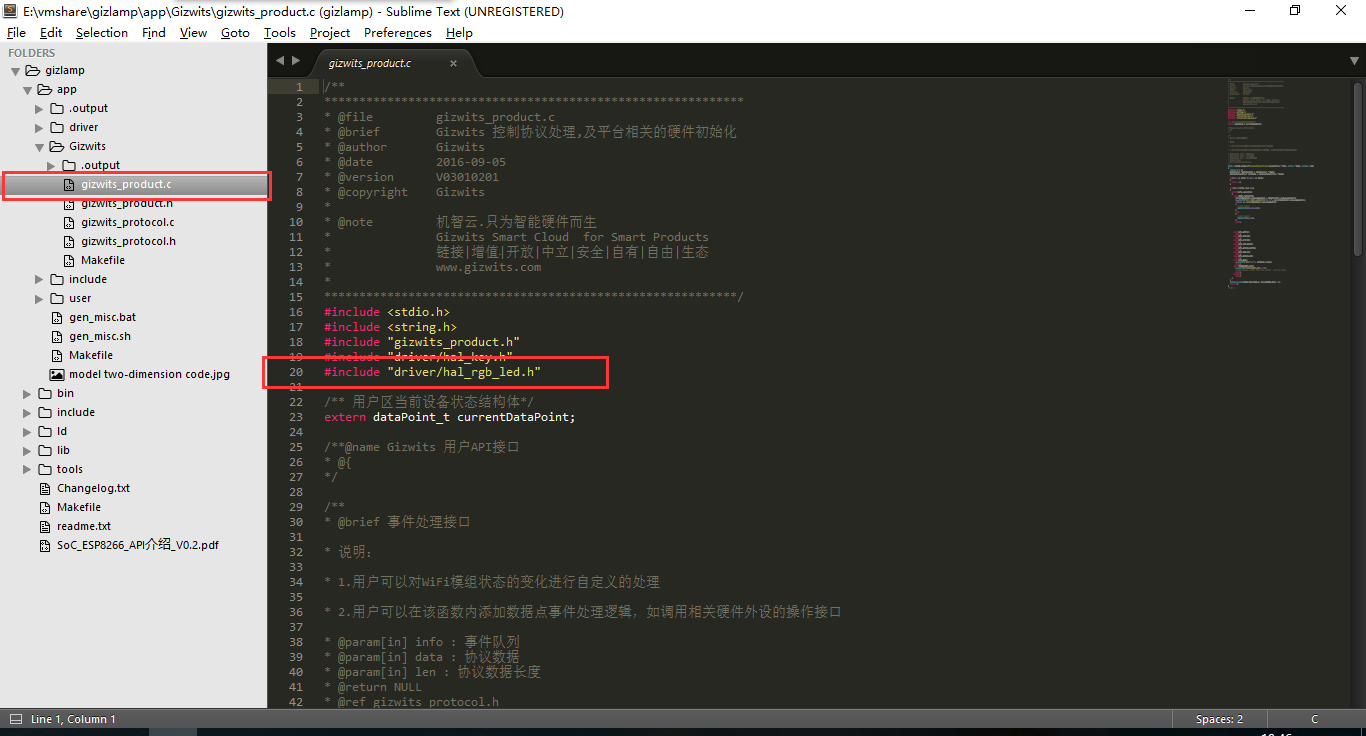
Then add the following header file in gizwits_product.c
1
#include "driver/hal_rgb_led.h"
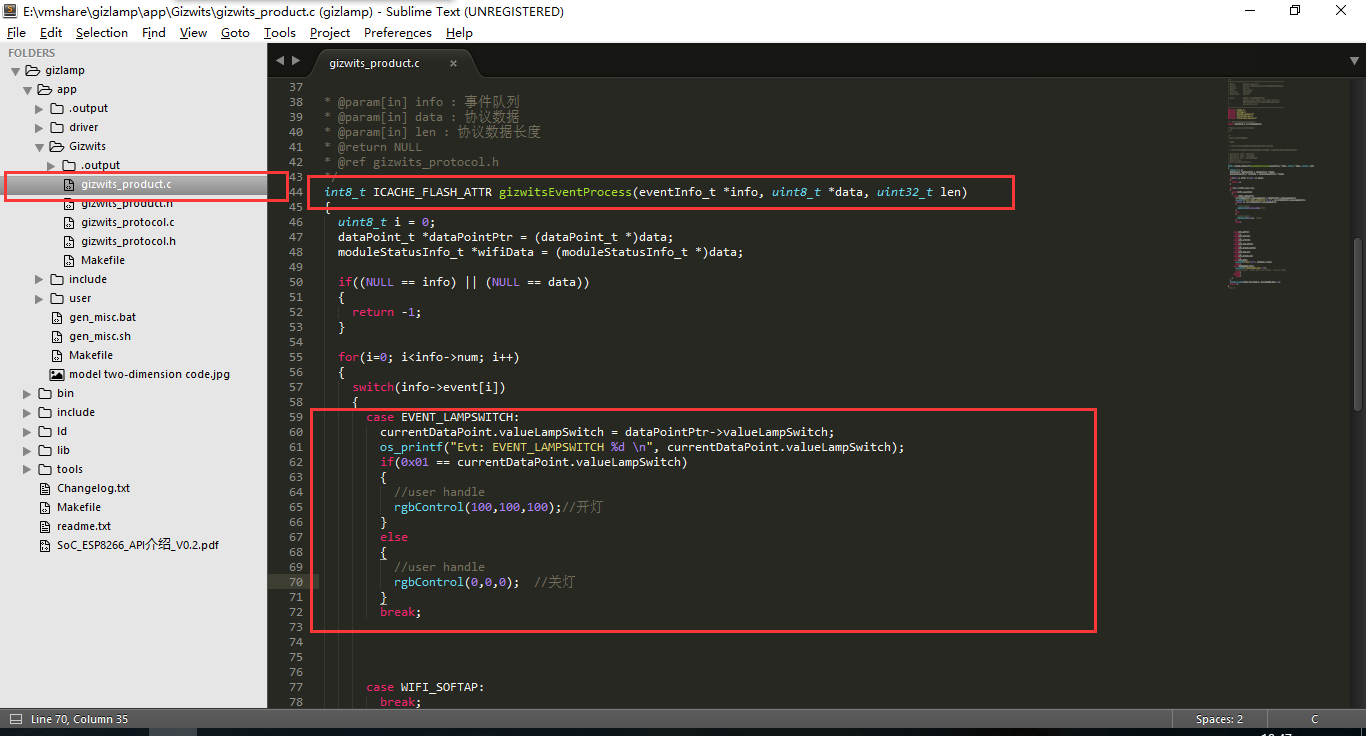
Then add the following function calls in the “//user handle” section of gizwitsEventProcess() function to drive the RGB light on Gokit3 to turn it on and off. To control the RGB light color combination, you can also modify the parameters of the rgbControl() function, each of which is set to a integer in the range of “0~254”. The rgbControl function can be found in the “hal_rgb_led.c” file.
1
2
3
//LED control function calls
rgbControl(0,0,0);// turn off the light
rgbControl (254, 254, 254); // turn on the light
Add the header file
Add the light switch event handling in gizwitsEventProcess() function
After completing the above actions, conduct the SoC code compiling environment setup as follows.
2.4.6 Set up SoC code compiling environment
See Set up development environment
Note: It is recommended to use Virtualbox and Espressif official development environment for secondary development.
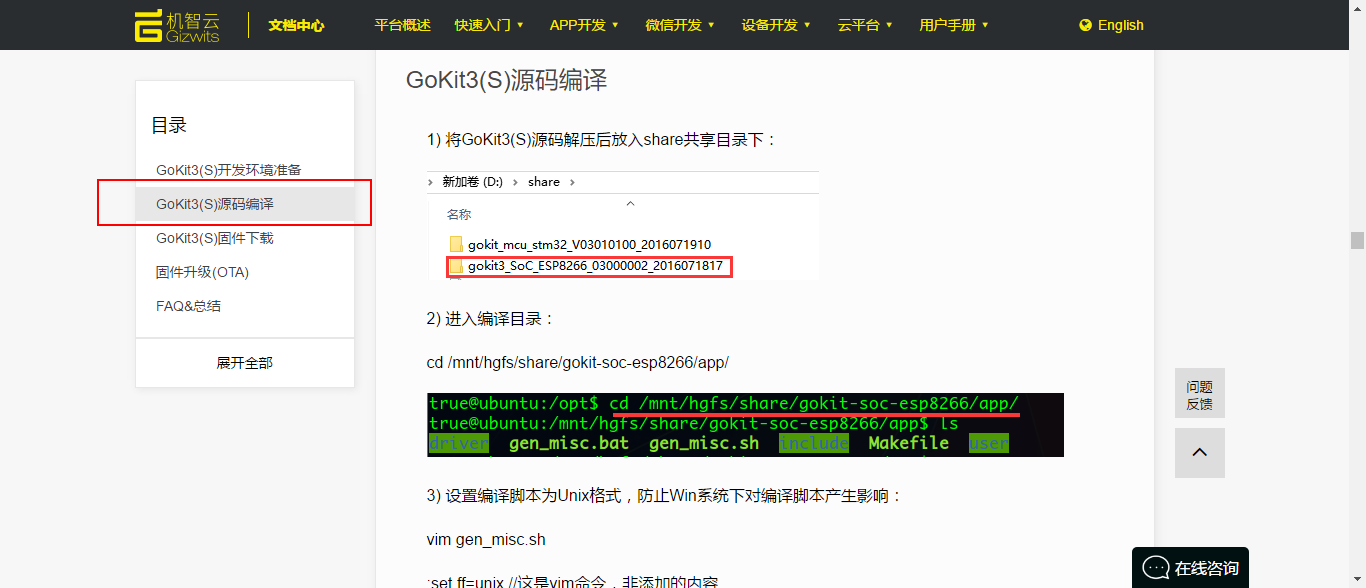
2.4.7 SoC code compilation
See Code compilation
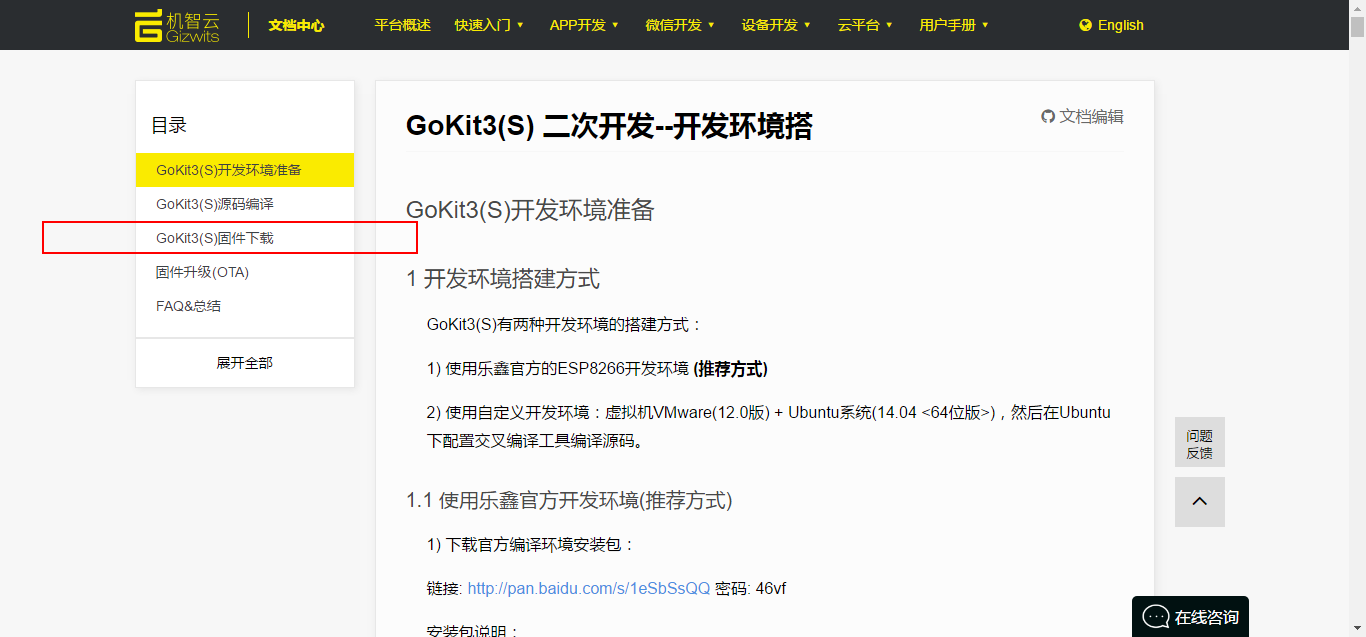
2.4.8 Download firmware
See Download firmware
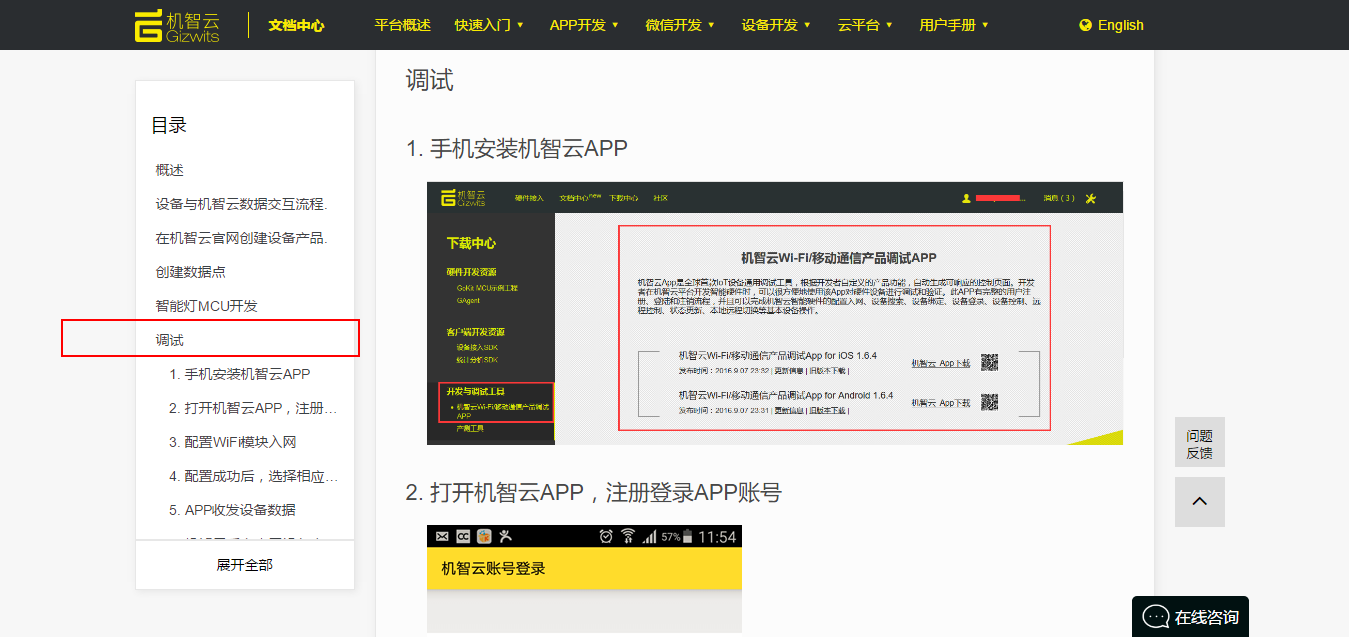
3. Debug and release
For product debug, see here.
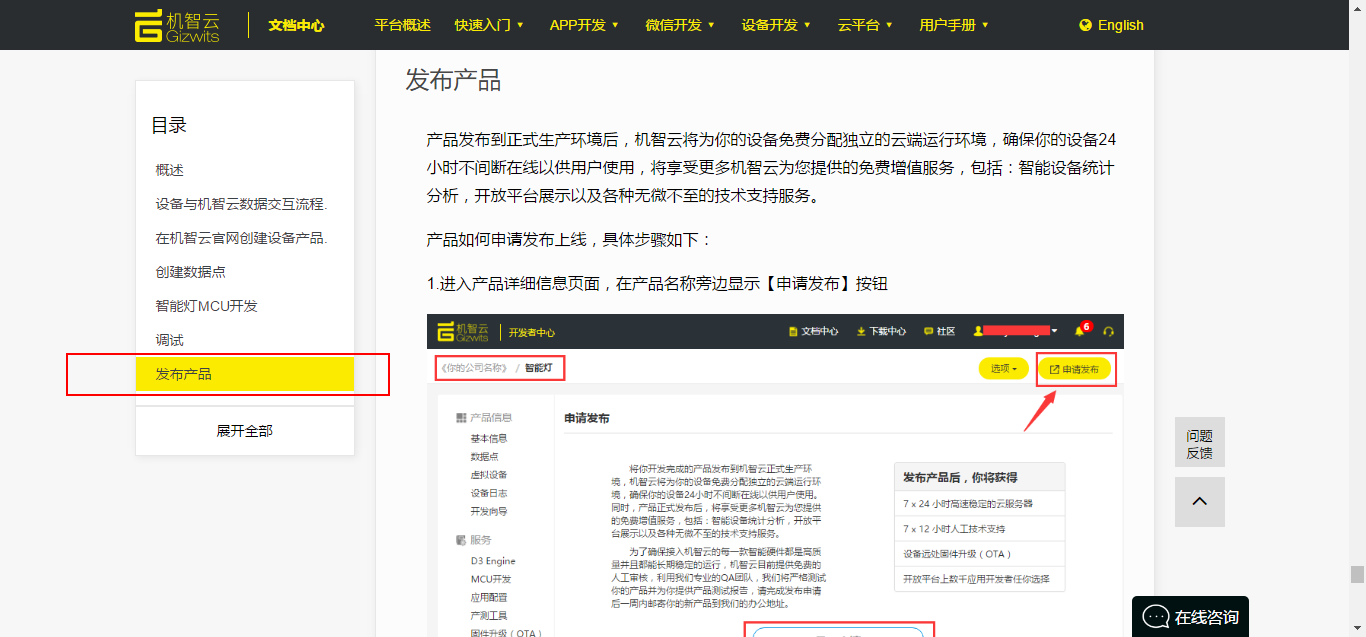
For product release, see here.
4. Project completion
After the above steps finished, the entire project development is complete. If you need more open source projects and want to discuss with other developers, you can visit Gizwits Developer Community: http://club.gizwits.com/forum.php
Appendix: UART0 tutorial for ESP8266-SoC scheme
Click here to download UART0 tutorial for ESP8266-SoC scheme.