If you decide to use SNoti for your product, you need to contact Gizwits technical support and provide the following information for the product, including product key and product name.
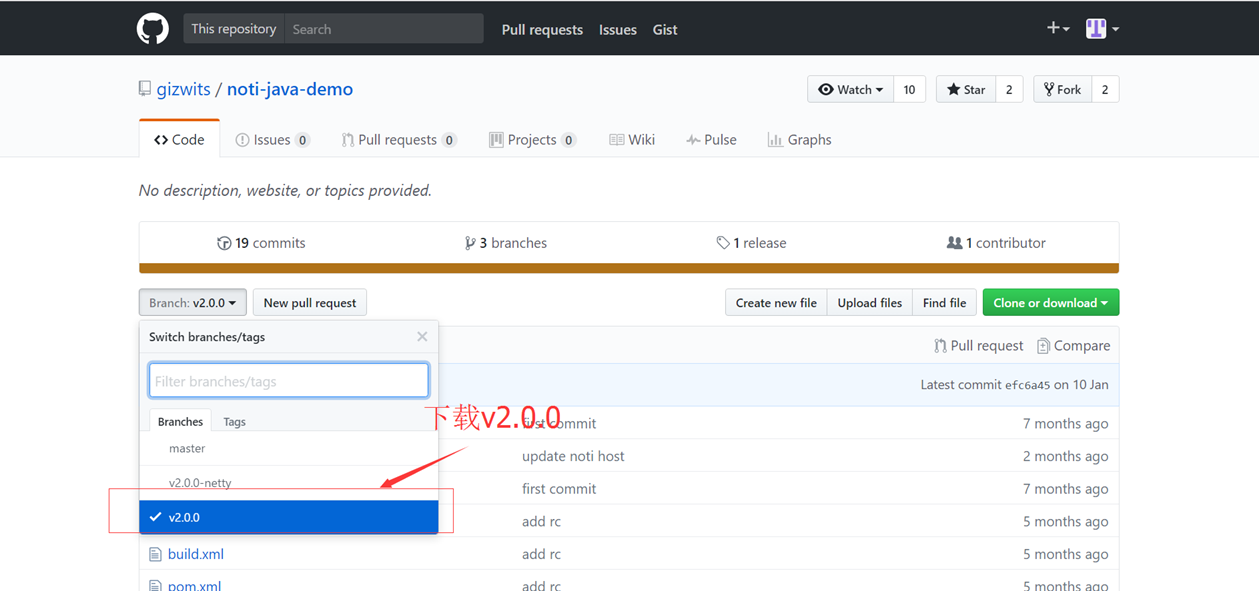
Gizwits provides two sets of SNoti demo source code:
V2.0.0-netty has a framework with its own dependency libraries.
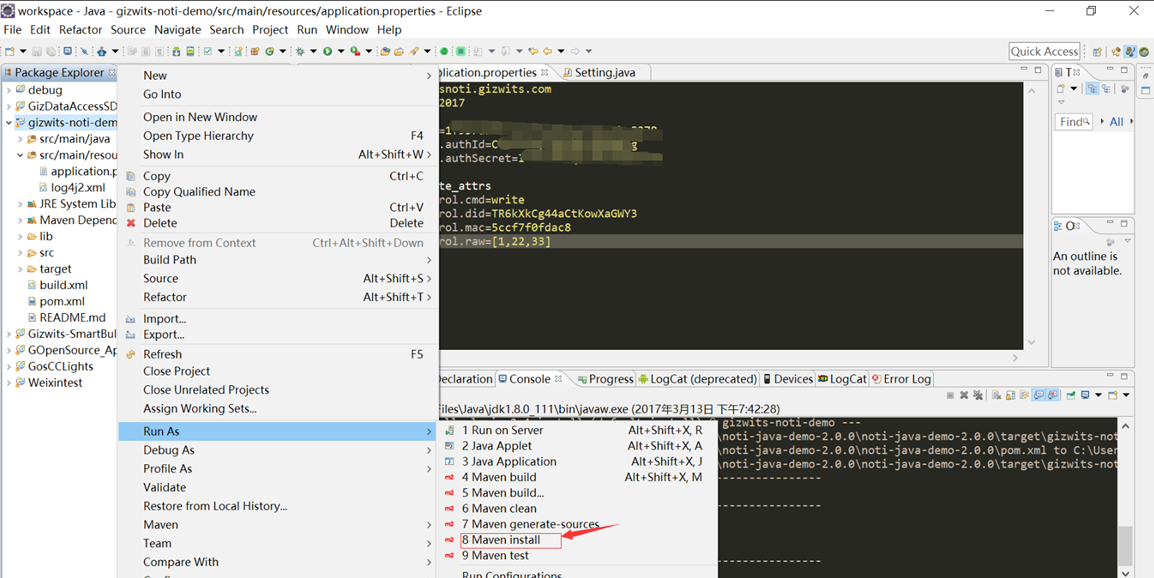
V2.0.0 has no framework, which will be explained below. Download it as shown below:
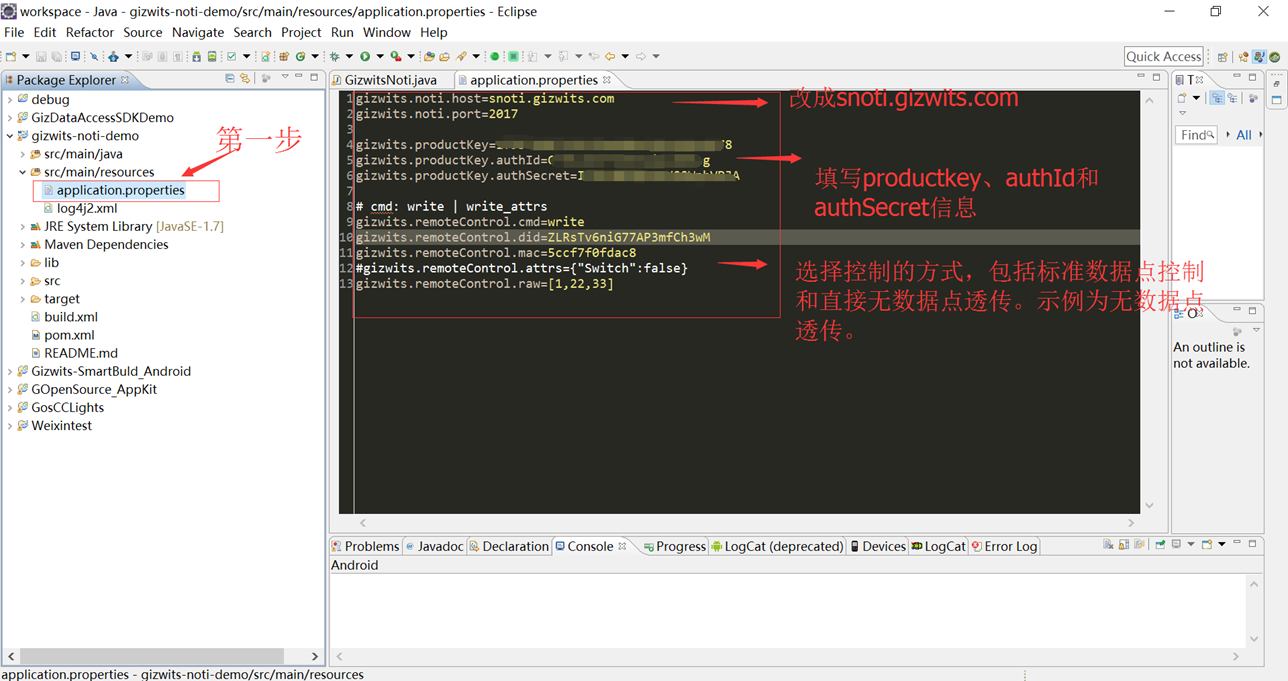
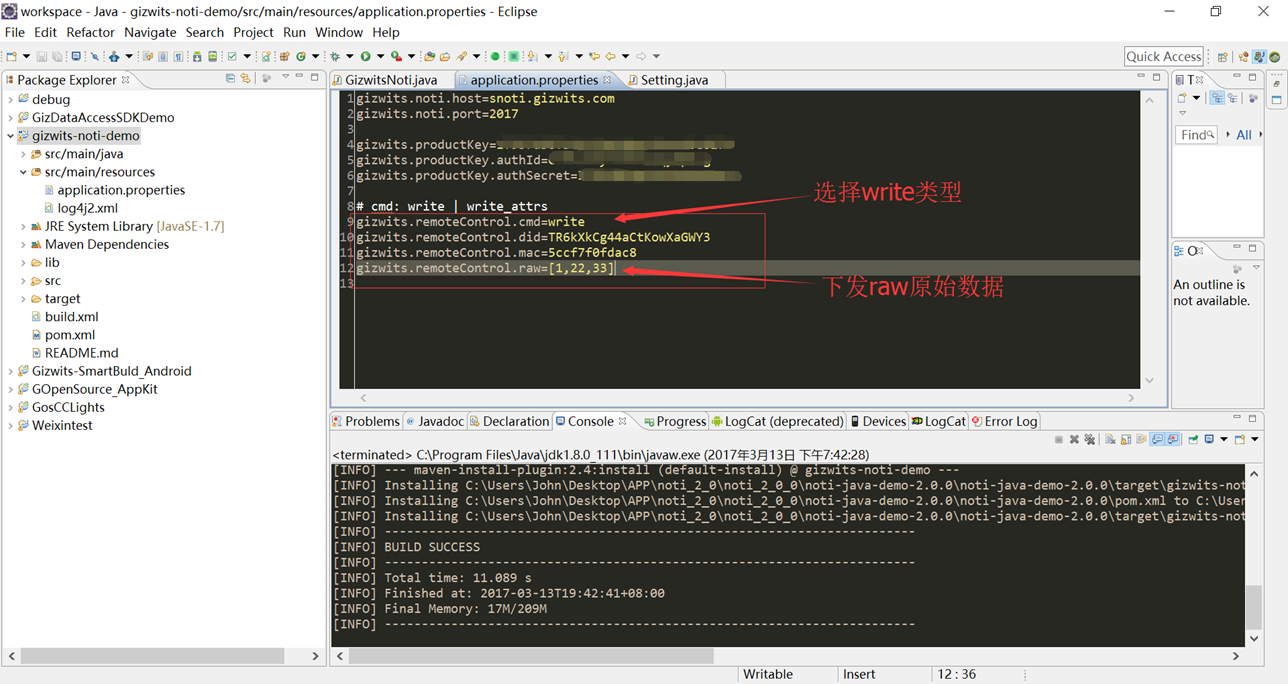
4.2. Update settings in the source code
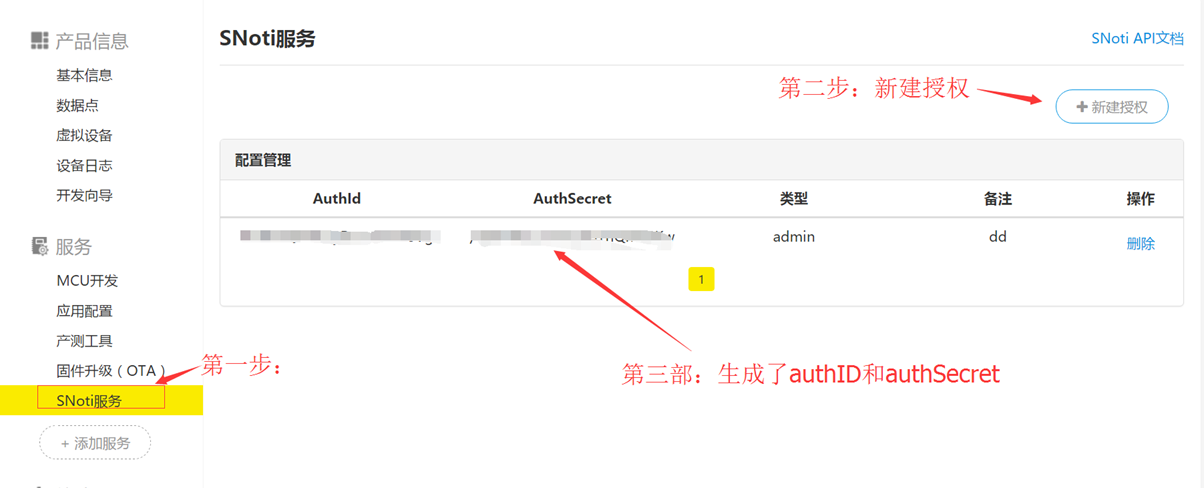
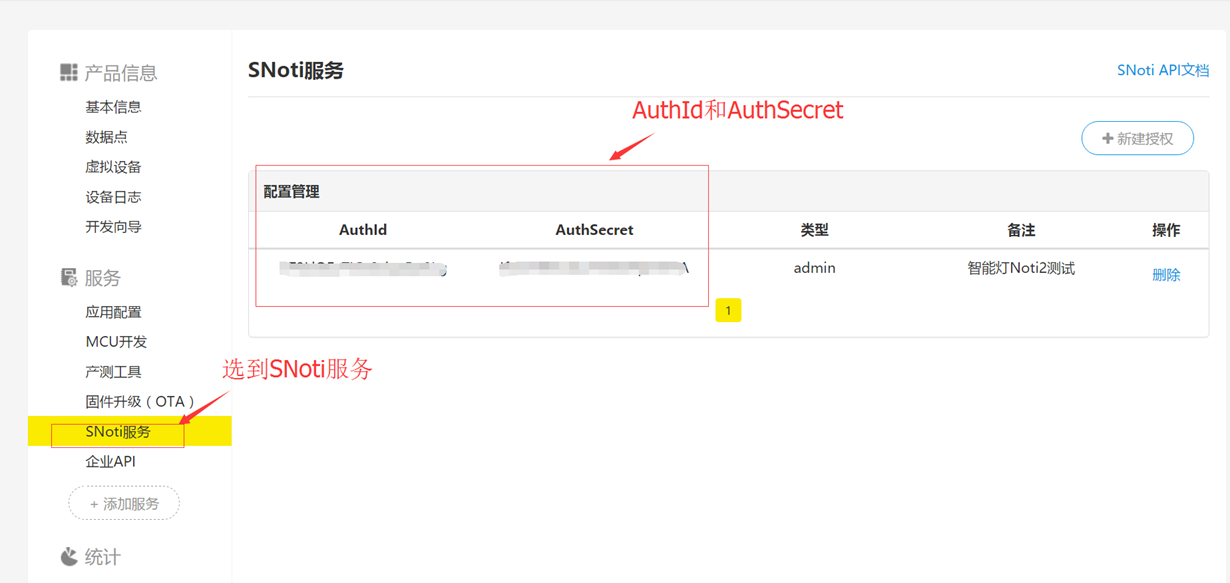
Find AuthId and AuthSecret as follows:
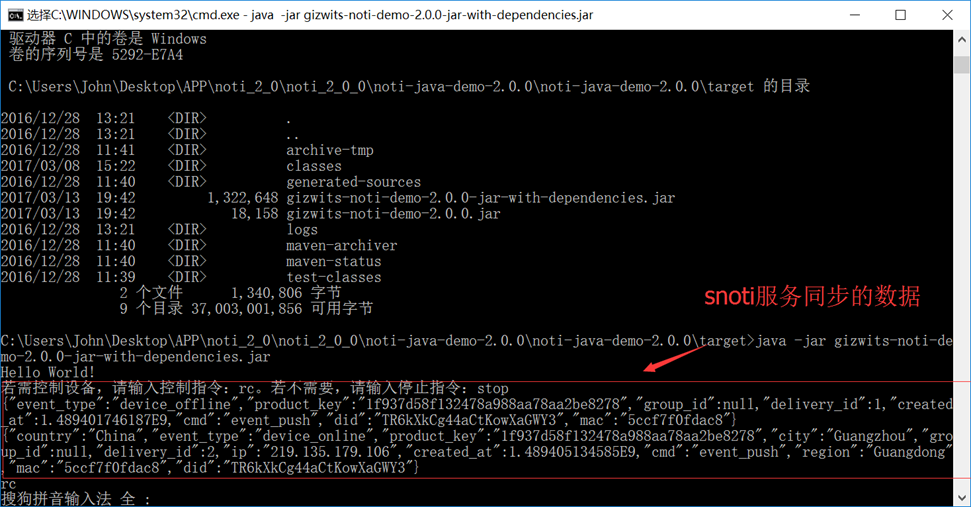
4.3. Control device
Note:
If you attempt to test the virtual device on Gizwits official website, the MAC address should be assigned with virtual:site
If you need to access SNoti servers in US East region, the domain name should be changed to ussnoti.gizwits.com
The JSON data of issued control instructions follows UTF-8 format
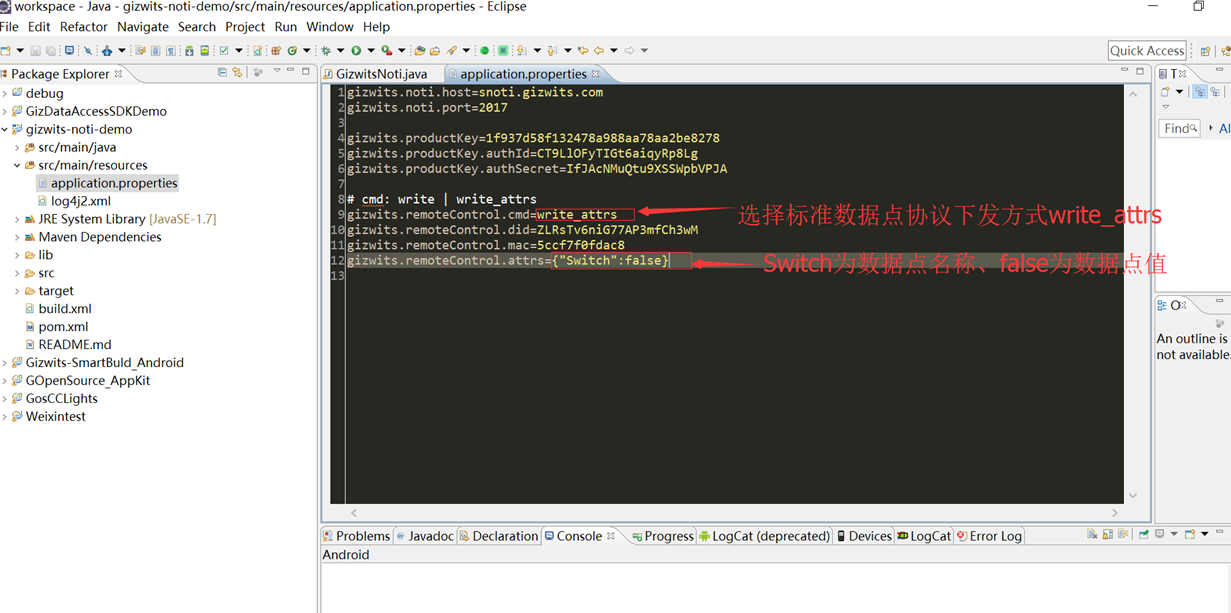
4.3.1. Issue control instructions in V4 product data point format
Types of writable data points include: Boolean, enumeration, numeric, and extended type. The format is “name1”: value1, of which “name1” refers to the name of the data point, and value1 refers to the value of the data point. The value might be true/false (bool), a Unicode encoded string such as \u62bd(enum), a number or byte array (such as [23,2,3], for extended type). See the following examples:
a. Boolean type, e.g. attrs={“Switch”:false}
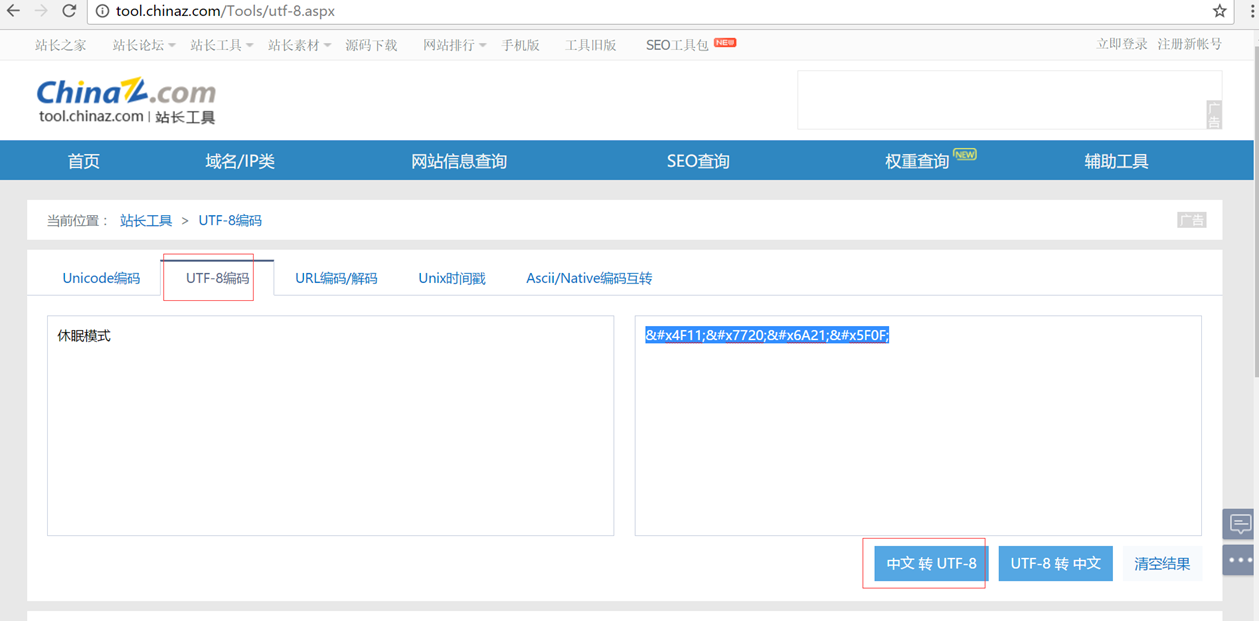
b. Enumeration types, e.g. attrs={“Mode”:”Sleep Mode”}//If issuing the enumeration type data point value with its original text string directly, it will fail. Thus, check if the format of the delivered text is UTF-8. If not, please send it after conversion. Take attrs={“Mode”:”休眠模式”} as an example, since the delivered JSON data “休眠模式” is not in UTF-8 format, it should be converted to attrs={“Mode”:”休眠模式”}.
d. Extended type, e.g. attrs={“extension”:[1,2,3,4,5,6,7,8,9,0]}
4.3.2. Issue control instructions in V4 product custom format (for transparent transmission without data points)
(1) Issue SNoti control instructions
The format for sending raw data looks like this: raw={1,22,33} Note: the binary data should be converted to a byte array. If you want to send 010203, it should be
1
2
3
{
"raw": [1, 2, 3]
}
In general, a protocol payload is a hexadecimal array, such as [0x00, 0x00, 0x1a, …].
Here you need to convert it into a decimal array. For example, the payload of decimal 123 is supposed to be raw=[123]
(2) Device reports its state After the device receives a control instruction issued by the cloud, the device actively reports its current state.
FF FF 00 09 05 00 00 00 04 01 02 03 18
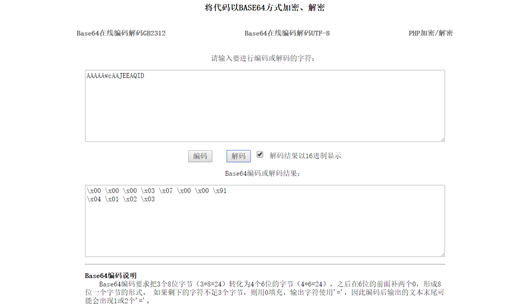
Because the data received is transparently transmitted, it is base64 encoded, and you have to decode it yourself.