概述
本文主要介绍了如何快速使用机智云安卓APP开源框架来进行APP的开发与测试,在阅读本文档之前,请先完成APP开发准备工作
10分钟部署调试机智云APP开源框架
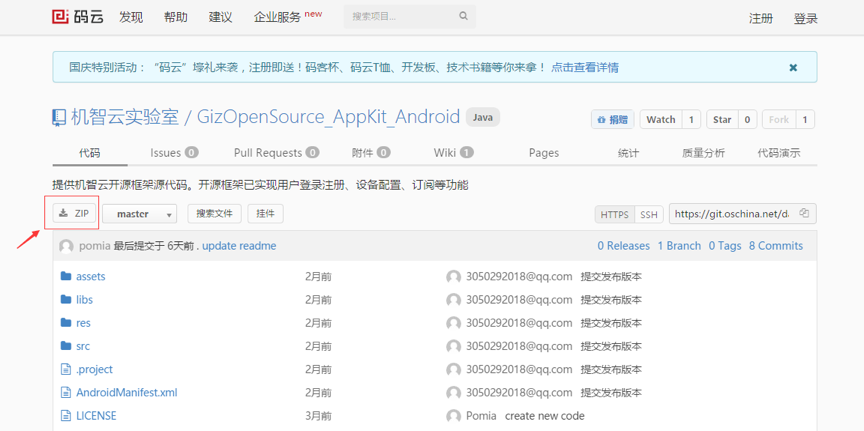
1. 下载安卓APP开源框架
APP开源框架编译环境:Eclipse
安卓APP开源框架下载地址:
https://git.oschina.net/dantang/GizOpenSource_AppKit_Android
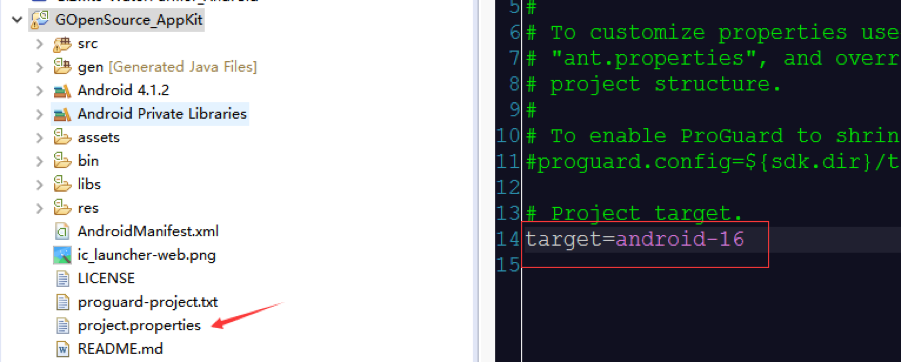
2. 导入到Eclipse工程
导入过程中可能会出现如下错误

此时需要将project.properties中的target版本修改为eclipse对应的安卓SDK版本即可。
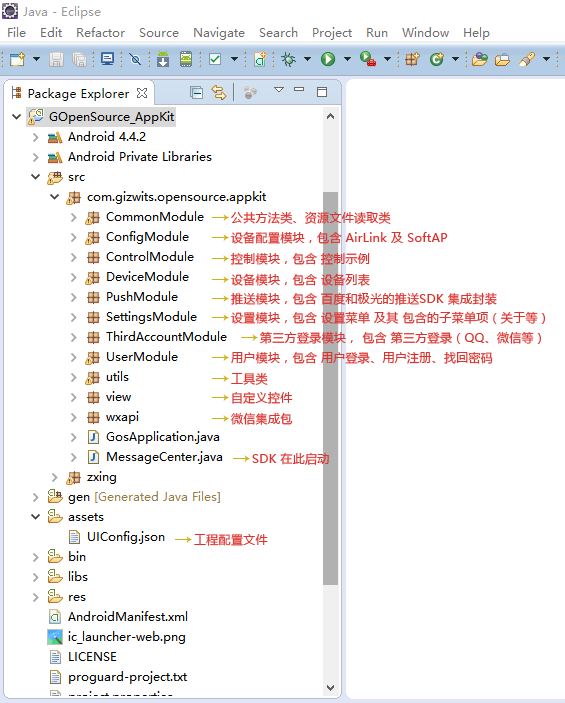
3. 开源框架包结构说明
如下图所示,将Package Presentation设置为Hierarchical

此时可以清晰的看到整个工程的目录结构,如图所示,机智云开源框架将每一个模块都独立为Package, Package与Package之间进行最大程度解耦。在开发过程中,如果想删除某一功能,比如不想使用第三方登录,则可以直接将“ThirdAccountModule”包直接删除即可,不会对其他包产生影响。
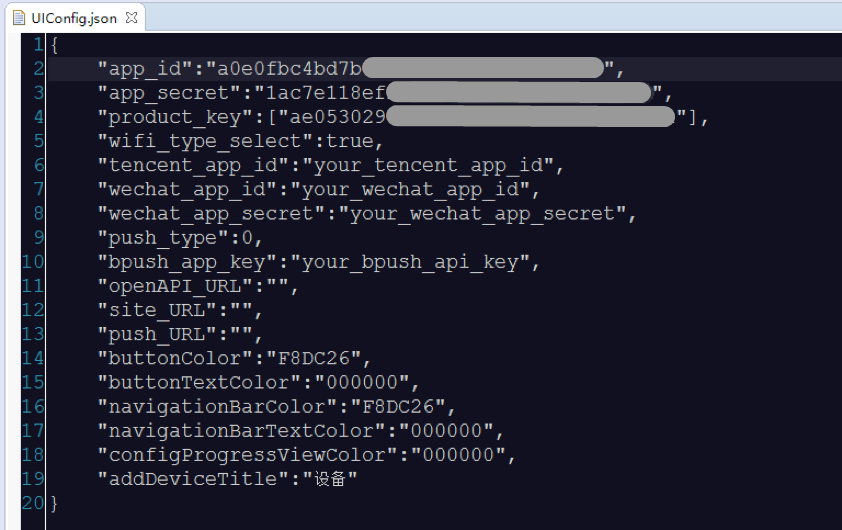
4. 修改UIConfig.json文件
在上面所列的文件中。assets目录下的UIConfig.json文件是一个全局配置文件,在这里可以设置工程的配置信息,逐一介绍:
- app_id:机智云 app id
- app_secret:机智云 app secret
- product_key:机智云 product key
- wifi_type_select:默认配置模块wifi模组选择功能是否开启
- tencent_app_id:qq登录 app id
- wechat_app_id:微信登录 app id
- wechat_app_secret:微信登录 app secret
- push_type:推送类型 【0:关闭,1:极光,2:百度】
- bpush_app_key:百度推送 app key
- openAPI_URL:openAPI 域名及端口,格式:“api.gizwits.com:80”,不写端口默认80
- site_URL:site 域名及端口,格式:“site.gizwits.com:80”,不写端口默认80
- push_URL:推送绑定服务器 域名及端口,格式:“push.gizwits.com:80”,不写端口默认80
- buttonColor:按钮颜色
- buttonTextColor:按钮文字颜色
- navigationBarColor:导航栏颜色
- navigationBarTextColor:导航栏文字颜色
- configProgressViewColor:配置中界面 progress view 颜色
- addDeviceTitle:添加设备界面 导航栏标题文字
- qq:是否打开QQ登录【true:打开】
- wechat:是否打开微信登录【true:打开】
- anonymousLogin:是否打开匿名登录【true:打开】
在机智云官网上分别找到产品的Product Key、App ID与App Secret分别填入json文件中对应的位置,如下图所示:
5. APP部署运行
正确填写Product Key、App ID与App Secret后,工程就可以部署运行了,
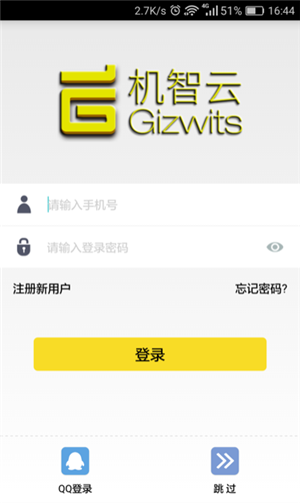
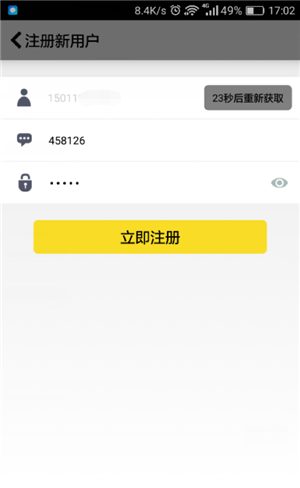
6. 注册新用户
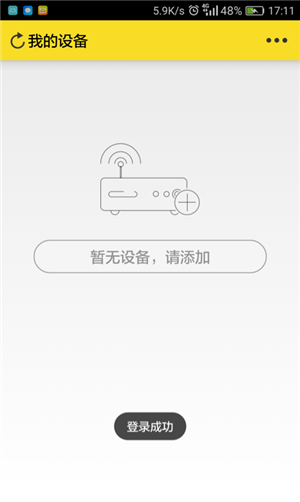
7. 登录用户
注册成功后,APP会自动登录,此时将跳转到“我的设备”界面
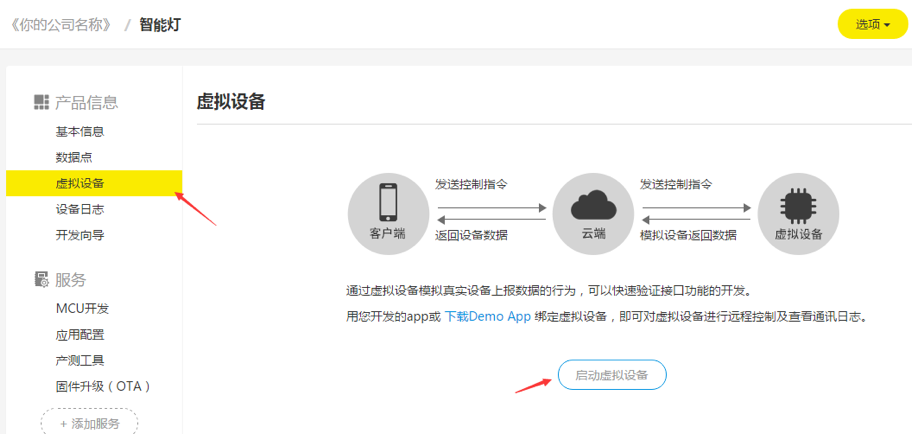
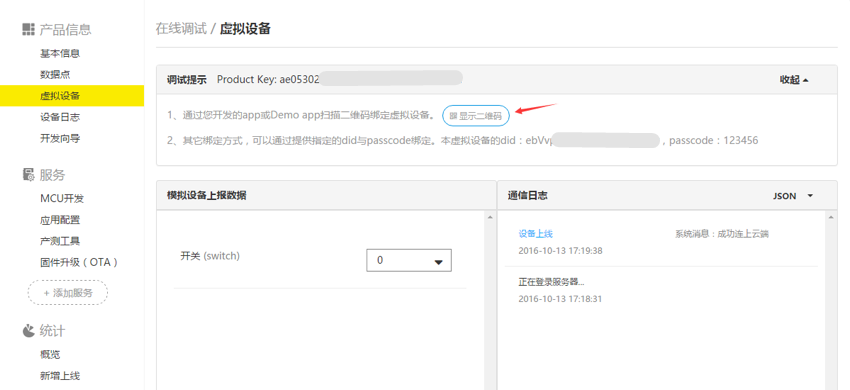
8. 启动虚拟设备并显示二维码
打开开发者中心对应产品的“虚拟设备”栏目。
虚拟设备:云端自动生成的一个仿真设备,可模拟真实设备上报数据的行为。在实体设备还未开发完成的情况下,开发者可以利用机智云提供的虚拟设备工具进行APP调试,测试远程控制设备的功能。
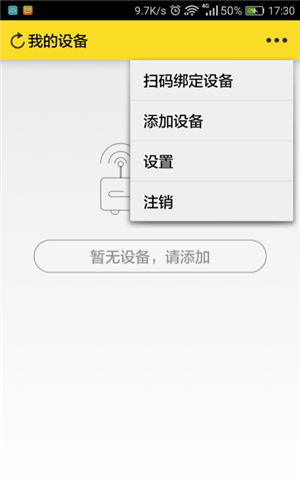
9. 扫码绑定设备
打开左上角菜单,点击扫描绑定设备
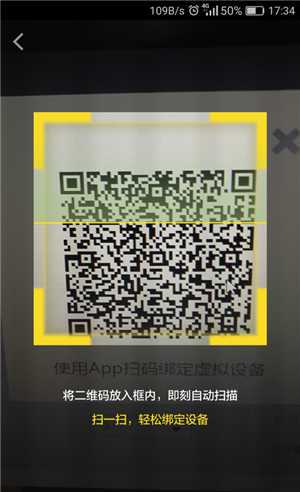
扫码成功后,会跳转回到“我的设备”界面,此时界面中会出现刚才扫描的“虚拟设备”
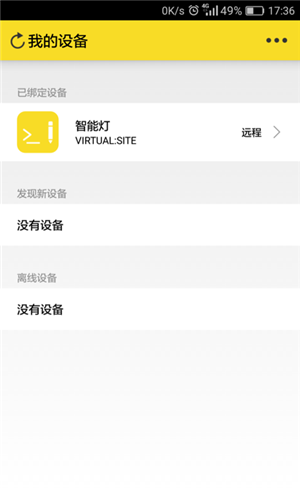
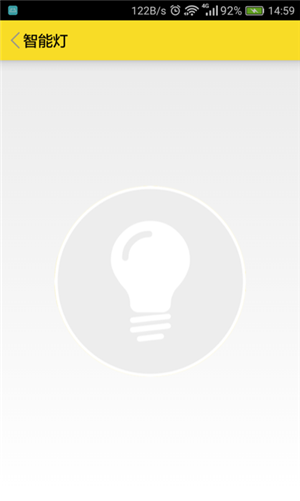
10. 点击“智能灯”,进入控制页面

进入控制页面,可以发现,控制页面为一个空白的页面。机智云开源框架为了让开发者快速开发APP,已将用户登录,设备发现,设备配网等功能做成了各个标准模块,仅保留控制页面让开发者自行开发设计,节省了开发者的时间。下章节,将示例如何快速开发一个简单好看的控制页面。
控制页面快速开发设计
1. 控制页面代码预览
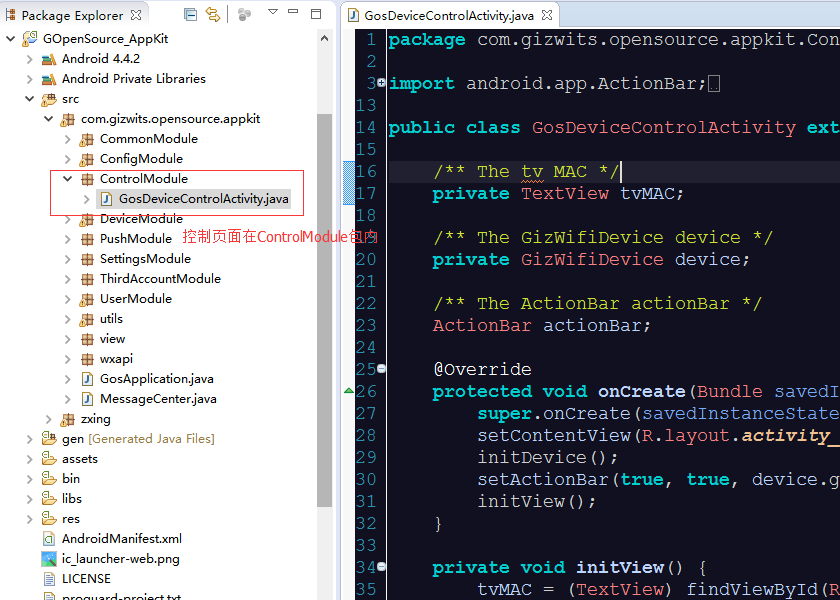
依次打开ControlModule -> GosDeviceControlActivity.java,可以看到,整个控制页面非常简单,就只有一个TextView将设备的mac地址显示出来。
2. 页面UI设计
根据创建的产品“智能灯”,想实现的UI效果如下:
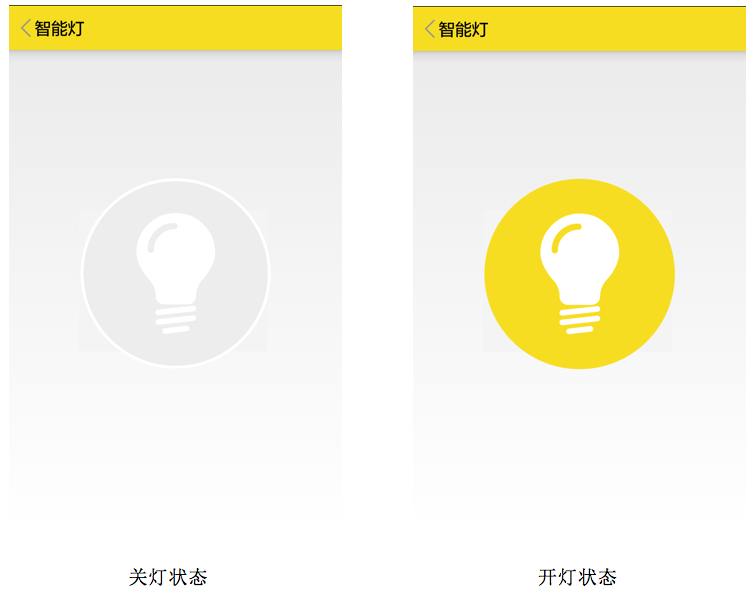
点击页面中间灯的控件,APP下发命令,控制灯的开关,并将灯的图片显示为开启状态。关闭的时候显示为关闭。
3. 页面布局代码开发
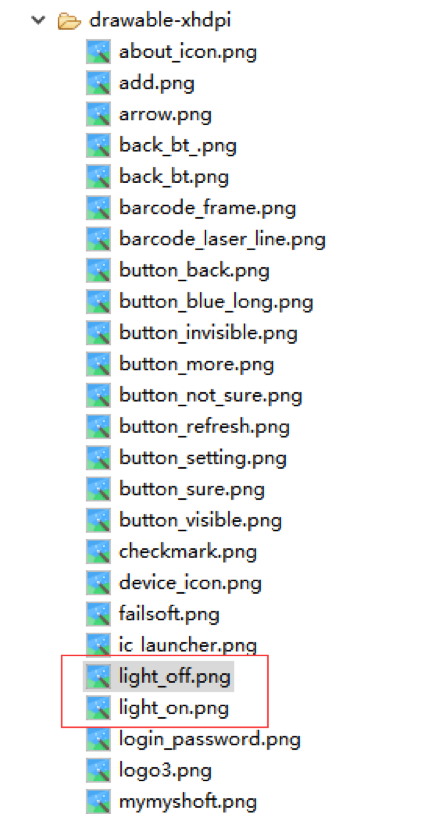
导入图片文件
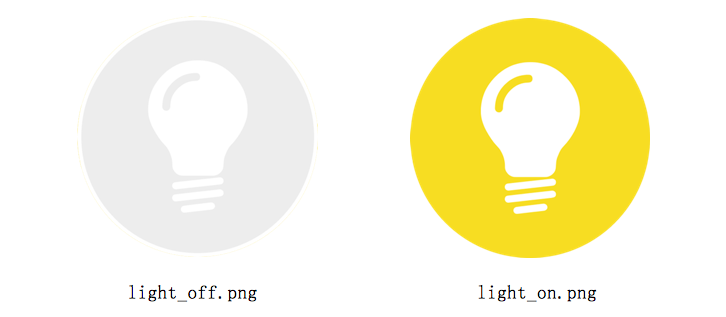
将表示智能灯开关状态的图片拷贝到drawable目录下,如下图所示:
1)打开控制页面对应的布局文件“activity_gos_device_control.xml”
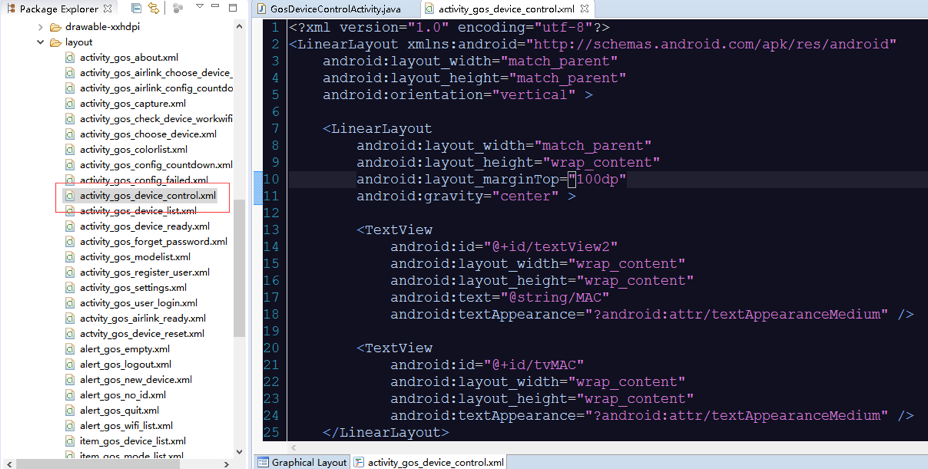
2)添加Button控件
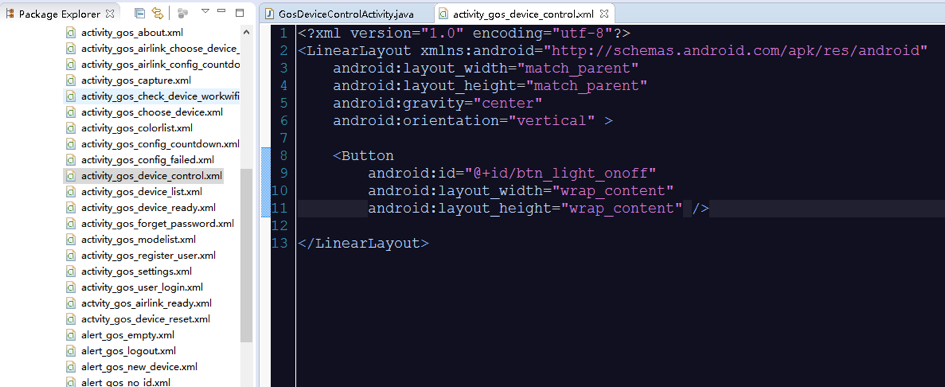
如图所示,将控制页面中多余控件删除,添加一个Button控件
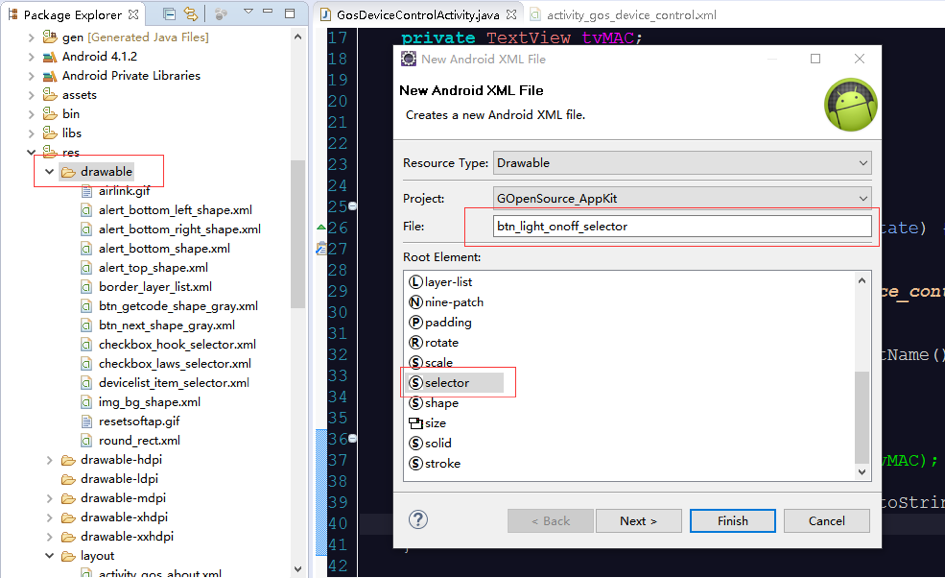
3)使用selector来对Button控件背景进行控制
在drawable文件夹下新建一个selector文件,如图所示:
在btn_light_onoff_selector.xml添加背景切换代码:
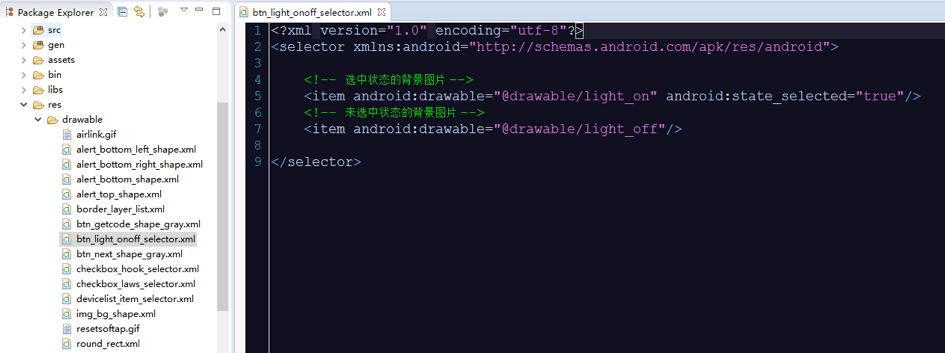
代码如下:
1
2
3
4
5
6
7
8
9
| <?xml version="1.0" encoding="utf-8"?>
<selector xmlns:android="http://schemas.android.com/apk/res/android">
<item android:drawable="@drawable/light_on" android:state_selected="true"/>
<item android:drawable="@drawable/light_off"/>
</selector>
|
4)将Button控件的背景设置为btn_light_onoff_selector,代码如下:
1
2
3
4
5
6
7
8
9
10
11
12
13
14
| <?xml version="1.0" encoding="utf-8"?>
<LinearLayout xmlns:android="http://schemas.android.com/apk/res/android"
android:layout_width="match_parent"
android:layout_height="match_parent"
android:gravity="center"
android:orientation="vertical" >
<Button
android:id="@+id/btn_light_onoff"
android:layout_width="wrap_content"
android:layout_height="wrap_content"
android:background="@drawable/btn_light_onoff_selector"/>
</LinearLayout>
|
此时整个页面布局就做好了。
4. 控制逻辑代码开发
4.1.编写控制页面代码
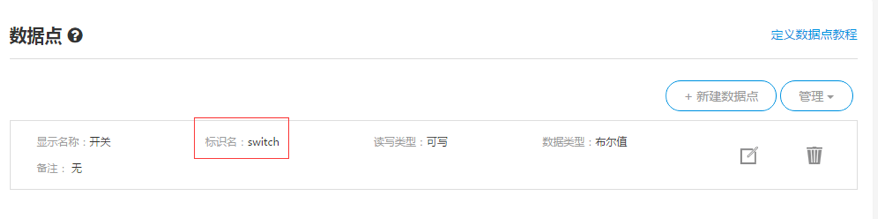
下图为该产品在云端创建的数据点。
整个GosDeviceControlActivity的参考代码如下:
1
2
3
4
5
6
7
8
9
10
11
12
13
14
15
16
17
18
19
20
21
22
23
24
25
26
27
28
29
30
31
32
33
34
35
36
37
38
39
40
41
42
43
44
45
46
47
48
49
50
51
52
53
54
55
56
57
58
59
60
61
62
63
64
65
66
67
68
69
70
71
72
73
74
75
76
77
78
79
80
81
82
83
84
85
86
87
88
89
90
91
92
93
94
95
96
97
98
99
100
101
102
103
104
105
106
107
108
109
110
111
112
113
114
115
116
117
118
119
120
121
122
123
124
125
|
package com.gizwits.opensource.appkit.ControlModule;
import java.util.concurrent.ConcurrentHashMap;
import com.gizwits.gizwifisdk.api.GizWifiDevice;
import com.gizwits.gizwifisdk.enumration.GizWifiErrorCode;
import com.gizwits.gizwifisdk.listener.GizWifiDeviceListener;
import com.gizwits.opensource.appkit.CommonModule.GosBaseActivity;
import com.gizwits.opensource.appkit.R;
import android.app.ActionBar;
import android.content.Intent;
import android.os.Bundle;
import android.util.Log;
import android.view.MenuItem;
import android.view.View;
import android.view.View.OnClickListener;
import android.widget.Button;
public class GosDeviceControlActivity extends GosBaseActivity {
private GizWifiDevice device;
ActionBar actionBar;
public static final String LIGHT_SWITCH = "switch";
private Button btnLightSwitch;
private GizWifiDeviceListener deviceListener = new GizWifiDeviceListener() {
public void didReceiveData(GizWifiErrorCode result, GizWifiDevice device,
ConcurrentHashMap<String, Object> dataMap, int sn) {
if (dataMap.get("data") != null) {
ConcurrentHashMap<String, Object> map = (ConcurrentHashMap<String, Object>) dataMap.get("data");
if (map.get(LIGHT_SWITCH) != null) {
boolean status = (Boolean) map.get(LIGHT_SWITCH);
btnLightSwitch.setSelected(status);
}
}
}
};
@Override
protected void onCreate(Bundle savedInstanceState) {
super.onCreate(savedInstanceState);
setContentView(R.layout.activity_gos_device_control);
initDevice();
setActionBar(true, true, device.getProductName());
initView();
}
@Override
protected void onDestroy() {
super.onDestroy();
device.setSubscribe(false);
}
private void initView() {
btnLightSwitch = (Button) findViewById(R.id.btn_light_onoff);
btnLightSwitch.setOnClickListener(new OnClickListener() {
@Override
public void onClick(View v) {
controlLight();
}
});
}
private void initDevice() {
Intent intent = getIntent();
device = (GizWifiDevice) intent.getParcelableExtra("GizWifiDevice");
device.setListener(deviceListener);
Log.i("Apptest", device.getDid());
}
@Override
public boolean onOptionsItemSelected(MenuItem item) {
switch (item.getItemId()) {
case android.R.id.home:
this.finish();
break;
}
return super.onOptionsItemSelected(item);
}
private void controlLight() {
if (btnLightSwitch.isSelected()) {
sendCommand(false);
btnLightSwitch.setSelected(false);
} else {
sendCommand(true);
btnLightSwitch.setSelected(true);
}
}
private void sendCommand(boolean onOff) {
int sn = 5;
ConcurrentHashMap<String, Object> command = new ConcurrentHashMap<String, Object>();
command.put(LIGHT_SWITCH, onOff);
device.write(command, sn);
}
}
|
4.2. 部署调试
完成上述代码编写之后,就可以部署到手机中测试控制结果了。
下发命令
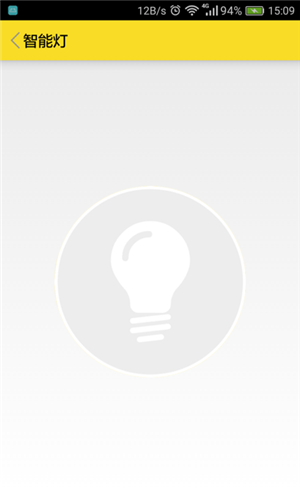
如图所示,APP部署到手机上后,进入到控制页面,如下图所示:
点击app中灯的图标,APP将下发控制命令,此时APP的按钮图标将变为开灯状态。

此时可以在云端虚拟设备的通信日志中看到app下发的控制命令,如下图:
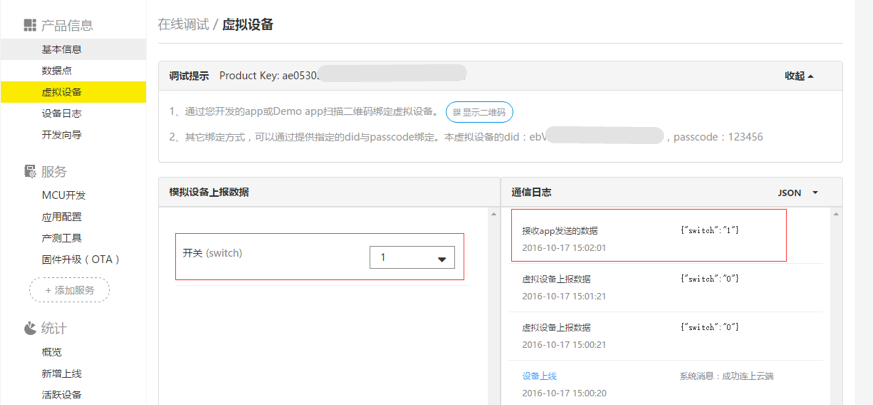
设备主动上报数据
如图所示,在虚拟设备中,将开关的值改为“0”,点击下面的推送,此时可以看到通信日志中会有一条记录“虚拟设备上报数据”,表示设备上报数据成功了。
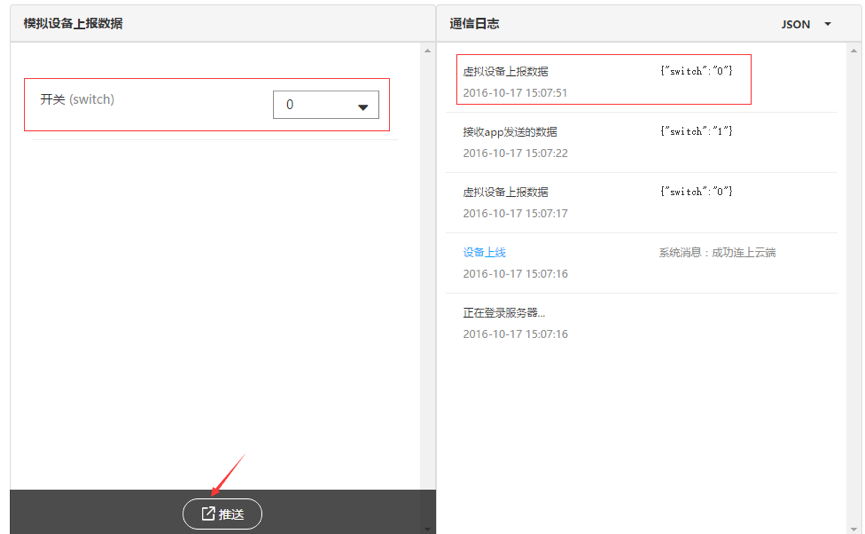
此时APP的控制页面中,灯的按钮马上变成了关灯状态,表示APP成功收到了设备的上报数据。
5. 重要提示
查阅《APP开源框架》,可了解
查阅《APP开发SDK》,可随心开发IoT APP(很多细节设计,均可在里面找到应用案例)
更多应用开发